How to customize the microsoft access ribbon from scratch? Step by step guide
What is known as the “ribbon of options” in any of the Office programs , refers to the band that is located in the upper part of the program window that contains the command groups. Without a doubt, it is a very important component in the user interface.
Once you have become familiar with Access, you may want to create a little more advanced applications, so you will require more specific functions such as customizing the Office Fluent ribbon, in order to make the application easier to use.
Therefore, in this post we explain how to customize the Microsoft Access ribbon from scratch? , through the help of a simple step-by-step guide. In addition to that, we will explain what this tape is and what it is for.
What is the Microsoft Access Ribbon and what is it for?

First of all, and in simple words, the Access ribbon is the strip of tabs at the top of the program window that contains all the command groups. You could say that it is the main replacement for menus and toolbars. It consists of tabs with groups of buttons. In this sense, once you enter the program, you will be able to see that within the options ribbon there are main tabs that group the most used related commands.
You can also see the contextual tabs that are only shown when you can use them, the quick access toolbar and a small toolbar that you can customize with your favorite commands. In the different tabs of the ribbon, some of the buttons offer a gallery of options, while others simply take care of starting a command. When you ask yourself the question of What is the Access Ribbon for ?, the answer is very simple.
This section is used to consolidate in one place tasks or entry points that previously used to require the display of menus, toolbars, and other user interface components. This way you will have a dedicated space exclusively to search for commands, instead of doing it a multitude of times. That is, when you open any database, the ribbon is located at the top of the main Access window where all the commands from the active command tab will be.
The main command tabs in Access are:
- File.
- Start.
- To create.
- External data.
- Database tools.
Learn step-by-step how to customize the Access ribbon

There are a number of things to keep in mind when you want to customize the Access ribbon . First of all, the system tables are not displayed in the navigation pane so it is necessary to change the settings in the Navigation Options dialog .
So you can see the USysRibbons table after creating it. But before doing so, you should be clear that all Microsoft Office programs that use the Office Fluent interface work with Extensible Markup Language (XML) in order to customize the ribbon.
Consequently, if you are going to customize it, it is recommended that you have basic knowledge in the area:
Before starting
As we noted earlier, the system tables are not displayed in the navigation pane. Therefore, you have to change the configuration to be able to see the UsysRibbons table.
The procedure is the next:
- When you have the database open in Access, right-click on the navigation bar at the top of the navigation pane. Then, click on Navigation options in the contextual menu.
- Within Navigation Options, specifically Presentation Options, check the Show system objects box . Then click OK.
Later, it is time to enable the display of error messages from the plug-in user interface. These types of messages are very valuable to the user, since they create and solve the problems of XML customization of the ribbon, so it is recommended to have Access display them.
The step by step to achieve this is indicated below:
- Click on File / Options.
- Once there, go to Client Settings.
- Under General, select the check box for Show plug-in user interface errors.
- Finally, click OK.
Create the USysRibbons system table
This table is used to store the customization XML for the ribbon.
The process to create the USysRibbons system table is:
- Go to the Tables group within the Create tab . Click on Table design.
- Next, you must add the following fields to the table (make sure to write them exactly as we indicated):
- Field name: Type: Autonumbering. Field size: Long integer.
- Field name: Type: Text. Field size: 255.
- Field name: Type: Memo.
- If you want, you can add more fields to the table, such as a comment field to describe the XML function of the ribbon.
- Select the ID field. Go to the Tools group of the Design tab and click on Primary Key.
- Go to Toolbar shortcut, tap Save or press CTRL + S. Then, write a name to the new table USysRibbons.
Add ribbon customization XML to USysRibbons table
To explain this procedure much better, we will do it with an example. Imagine that you want to prevent your database users from using any of the tools that are in the Create tab. Besides, you want to make a new tab called Custom tab that has the Paste command on it. The XML code that we will mention below, creates that configuration.
In this sense, the step by step is:
- Go to the navigation pane and right-click on the USysRibbons table. Later, click on Datasheet view within the contextual menu.
- Add the following data to the table (we recommend copying the XML example and pasting it directly into the table):
- ID: Autonumbering.
- RibbonName: My tab.
- RibbonXML:
<customUI >
<ribbon startFromScratch = "false">
<tabs>
<tab idMso = "TabCreate" visible = "false" />
<tab id = "dbCustomTab" label = "A Custom Tab" visible = "true">
<group id = "dbCustomGroup" label = "A Custom Group">
<control idMso = "Paste" label = "Built-in Paste" enabled = "true" />
</group>
</tab>
</tabs>
</ribbon>
</customUI>
- This XML is the one indicated to execute the aforementioned function. Therefore, it is important that the user, before customizing the Access ribbon, has knowledge of XML.
- Finally, you close the USysRibbons table, and then you close and reopen the database.
Apply the custom tape
Once the custom ribbon XML has been stored inside the table, you must follow one of the procedures that we will indicate. Each method will depend on what you want to do, that is, if you want to apply the tape to the entire database or if you only want to do it to a specific form or report.
Apply to the entire database:
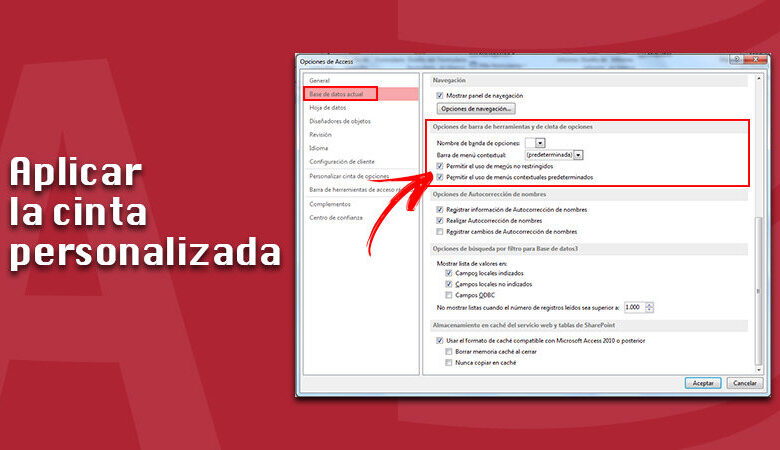
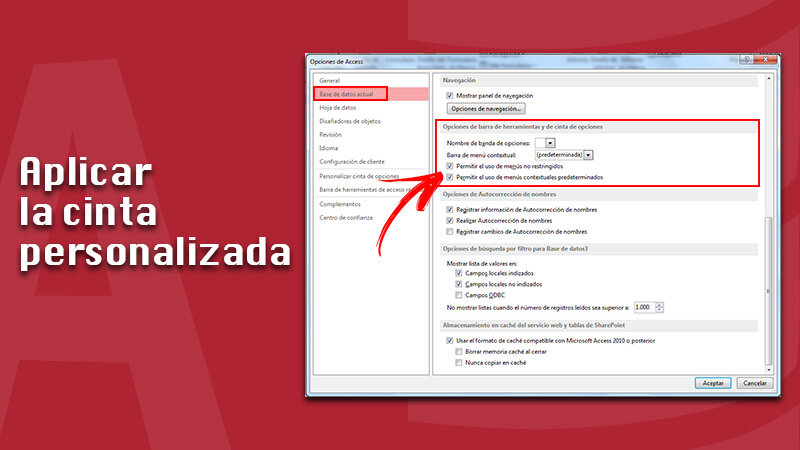
- Go to File / Options.
- Click on Current Database and then go to Ribbon and Toolbar Options. Click on the ribbon name list and select the option you want on the ribbon: in this case it would be “my tab” .
- Tap on OK.
Apply to a specific form or report:
- Within the navigation pane, right-click the form or report to which you want to apply the custom ribbon. Then, click on Design view in the context menu.
- In case the Property Sheet is not showing, press F4 to do so.
- Under Selection type, located at the top of the property sheet, make sure that the object type (report or form) is selected in the list.
- On the Other tab of the property sheet, click the Name list on the ribbon. Next, click on the ribbon that you want to display when opening the form or report (in this case it would be “my tab”).
- Click on the Save option in the Quick Access Toolbar, or press CTRL + S.
- Close the report or form, then double-click it in the navigation pane to reopen it. The ribbon you selected will be displayed.
After you verify that the custom ribbon works without problems, there is the possibility to hide the system tables again as follows:
- Right- click the navigation bar at the top of the navigation pane. Then, tap on Navigation options in the context menu.
- Under Navigation Options, specifically Display Options, uncheck the Show system objects check box . Finally, tap on OK.
If you have any questions, leave them in the comments, we will answer you as soon as possible, and it will surely be of great help to more members of the community. Thanks!