Linux
How to install and activate Ubuntu in Windows easily and simply

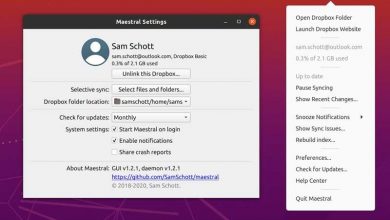
How to download and activate Ubuntu on Windows
- The first thing we are going to have to do is download Ubuntu from its official website.
- You will be able to appreciate that an LTS version appears that is generally older than the latest version. What is the difference? That the LTS version is the most stable. Therefore, it is the most recommended to install.
- Click on the green button that says “Download ” to download the version that we discussed above. It directs you to another page where you must wait a few seconds for the download to begin.
- When the download is finished you will be able to appreciate an .ISO file this you can use it on a DVD or a USB drive. The best practice is to use a USB drive to install Ubuntu.
- Now we are going to use Rufus to create the multi-boot USB . You can download it from its official website.
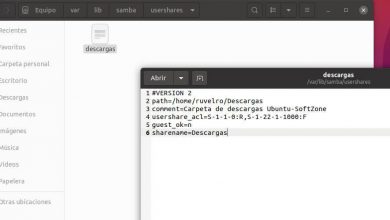
- The application is portable so you don’t need to install anything. By simply double-clicking it, it will open and you can start using it. Once opened, connect the USB drive to your computer. This USB drive should appear in the “Device ” field .
- After this you will have to click on the “Select ” button so that a new window opens and you can search for the ISO file that you downloaded previously.
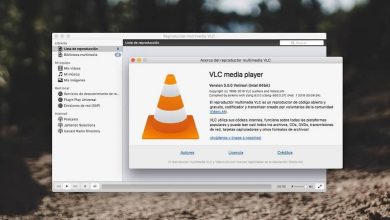
Installation
- After selecting the Ubuntu .ISO image. You don’t have to touch anything else as all the Rufus default options are ideal for creating the boot drive. To start the process you will simply have to click on “Start “.
- A window appears with a warning. It basically tells you that the version of the bootloader that syslinux uses is older than the one requested by the ISO. Do not give it too much importance and press “YES ” to connect to the internet and thus download what you need.
- After this we see a new window where it gives you two options. The one you should choose is the recommended one, which would be the first “Write in ISO image mode “.
- We will see a new window where it basically warns you that all the data on the USB drive will be lost, you just have to press “OK ” and wait for the process to finish.
Ubuntu alongside Windows
- Now you must leave the USB drive connected to the computer and restart it. While it does, you will have to hold down the key to choose the boot drive. This is usually done with the F12 key. However, depending on the BIOS and the computer, it may be the ESC, DEL, F10 key, etc.
- When the menu to choose the boot drive appears, let’s choose the USB drive and press “Enter.”
- As soon as the USB starts we can choose the language in which we want to see the entire installation process. Obviously here the most advisable thing is to select Spanish.
- Now you will see a new menu with various options. You can try Ubuntu without installing it. It is ideal if it is your first contact with this operating system since among the functions, this one that you can use the distribution without having to install anything.

- Ubuntu starts without installing anything, you can use it however you want. In case you like it, you will see an icon that says “Install Ubuntu “. If you decide to install it when you run the installer you will have to choose the keyboard layout.
- The next thing is to choose the wireless network in case you have Wifi. Likewise, if you don’t want to connect to the internet during this process, you can skip this step.
- Next, you are going to choose which applications you would like to install to get started. The first option allows you to do a normal installation. The minimal installation with the basic utilities and the rest you will have to install them yourself.
- You can also find in the last option the possibility of installing various third-party programs.
Now the installer will detect that you have Windows 10 on this computer. Therefore, you must choose this option if you want to have both operating systems when Ubuntu activates your Windows.