How to create a Persistent USB in Ubuntu with mkusb – Quick and easy

Ubuntu is a fairly versatile open source operating system that allows you to have many tools that you can take full advantage of. The tools you can count on range from knowing the weather forecast to having all kinds of extensions and office or scheduling programs.
Thanks to the fact that this system is one of the safest and most customizable, you will not have to worry about it being infected with a virus. Since viruses are normally programmed to attack other more vulnerable operating systems. In spite of everything, you can install Comodo for Linux for added protection. But that’s not all, you can also create a persistent USB with Ubuntu, in this article we will guide you.
What does a persistent USB installer do?

These Unix USBs, like the Universal USB Installer, allow you to create the files needed for booting on a partition. This same partition is formatted with FAT32 and due to limitations in the same FAT32, the file size has a maximum size of 4G.
Now if what you want is more persistent storage, you can replace it with a partition whose storage limit will be the same as the USB memory you are using at the time.
You can use the GParted partition manager where you can change the size of the FAT32 partition and thus have more space for a new larger EXT4 partition to enjoy more storage.
The persistent file you have can be removed and when you turn your computer back on, the Ubuntu operating system will automatically select the persistent partition with the most space.
But although so far everything sounds great, there is a slight drawback, Ubuntu by itself cannot modify its own active boot partition, so it will need another Ubuntu system to achieve this. You can use a second USB device that contains Ubuntu Live. We will show you below what are the steps to follow.
How to create a persistent USB in Ubuntu?

This time we will use the 32-bit version of Ubuntu 13.10, if you do not know what the version of your Ubuntu system is, you can do it easily, on the other hand, to create a persistent USB you must follow the following steps:
- The first step to follow is to install Ubuntu on two USB devices and in them, make a small configuration so that both have a persistent storage of at least 100 MB.
- You must open or run Ubuntu from one of the drives and the other keep it disconnected.
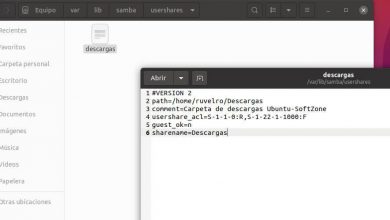
- You should look for the GParted Partition Editor option from Ubuntu Dash and open it. It is installed by default in 13.10
- This is when you should insert the other USB device and after a few seconds, update it in GParted, which you can open using the command Ctrl + R. When you do this, you should see a new device added to the list. You must check that the size of the same matches that of your USB and select it.
- Now you need to check the mount point (/ media / ubuntu / UUI)
- You should now open the terminal window using the command Ctrl + Alt + T and delete the persistent files using the following command: rm -v / media / ubuntu / UUI / casper-rw
- Refresh GParted and check the changes that have been made in Used
- Now, put your cursor over the partition and right-click and select the unmount option. If you followed the steps to the letter, you will notice that the mount point is no longer mirrored on the screen.
- Right click on the partition again, but this time select the Resize / Move option and you will see the assigned partition.
- It is time for you to create a new partition for persistent storage and choose the partition that you have not assigned and with the right button of your mouse click and select the New option.
- Now choose ext4 filesystem where you will label casper-rw and click Add.
- Check that all the parameters are correct and once you do, press the green button to verify and apply all pending operations.
- Now the penultimate step is to turn off your Ubuntu and remove the first USB device and restart from the second USB device
- Finally open a terminal with the command Ctrl + Alt + T and type the following command: df. –H and verify that the Avail size matches the persistent partition you created.