Easily share a Linux folder with Windows on LAN
The shared folders are one of the easiest ways we can use to share files between multiple computers connected to the same local network. The sharing computer saves the data on its own hard drive, and other LAN-connected computers can access it to open and copy its files, or send new files to the computer. Creating and configuring a local network to share a folder in Windows is very simple, since thanks to SMB the process is practically automatic. However, that does not mean that in Linux it is not possible, you just have to take a few more steps with SAMBA to achieve it.
One of the problems that users who use Windows and Linux in the same local network often encounter is that the computers do not see each other, that is, that there is no communication between them and they cannot share files. Far from reality, if the two computers are on the same network they will have communication.
Normally, Linux will detect drives and shared resources from Windows computers and allow us to connect to them without anything else. But sharing the resources so that others can connect to the PC can be a bit more complicated. To do this, we are going to resort to the use of SAMBA, a free implementation of Microsoft’s SMB protocol, thanks to which we can connect to Windows computers, and other SAMBA-compatible computers, to exchange files with them.
The process, although it is similar in all distributions, may vary slightly, especially in the menus and sections. We are going to explain how to do it in Ubuntu, since it is the most popular distro.
Install SAMBA
Before continuing, the first thing to do is install SAMBA. This is the free SMB / CIFS implementation that allows us to connect and interact with Windows networks from Linux distributions. Samba is a very small and totally free package. To install it, all we have to do is open a terminal and run the following command:
sudo apt install samba
SAMBA is not installed by default, as it is not a package that everyone will use. Anyway, if we forget this step, Ubuntu itself will tell us that, in order to share the folder on the network, we will have to install that package. And it will allow us to do it without using the Terminal from a wizard that we will see later.
Share a folder from Ubuntu file explorer
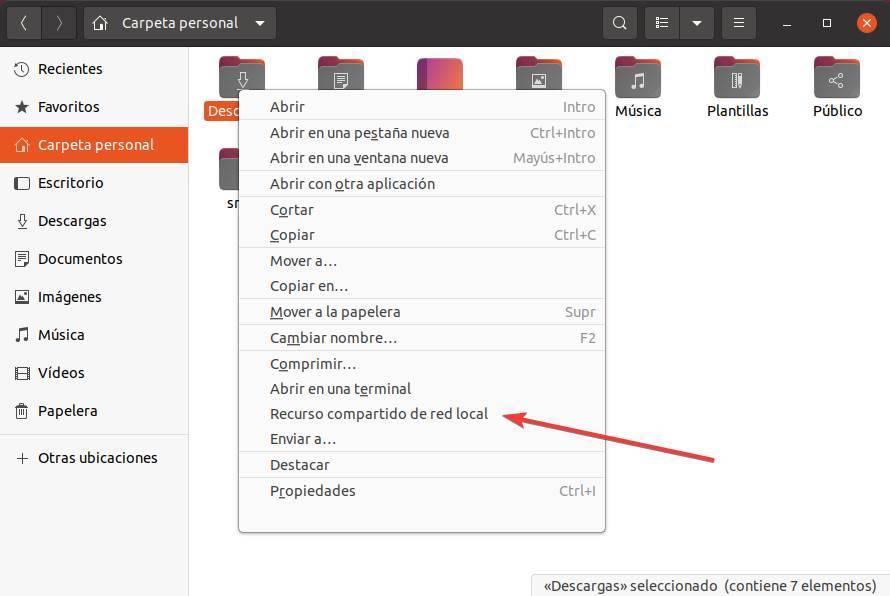
To share a folder from Ubuntu, what we must do is open the explorer and locate the folder that we want to share. We are going to put as an example the folder «Downloads», inside our personal directory.
Once the folder is located, we will click with the right button on it to choose the option « Shared resource in local network «.
We will be able to see a window like the following one from which we will be able to configure the folder’s sharing parameters. If we have not installed the “samba” package in the previous step, Ubuntu itself will tell us that, in order to activate the option to share this folder, we have to install it. We can do it by following the simple wizard that will appear. Or, if we prefer, close and install the package with apt as explained in the previous point.
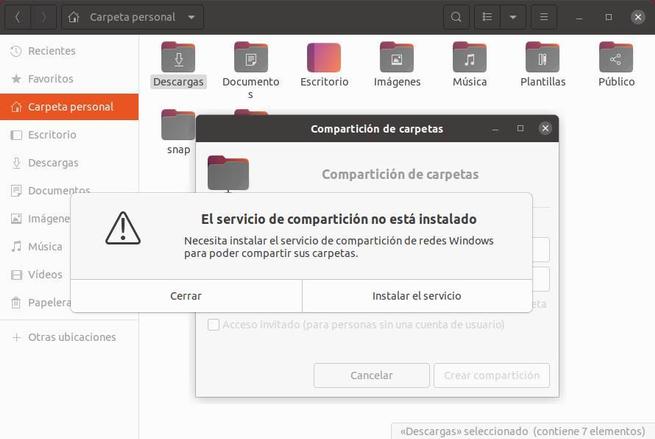
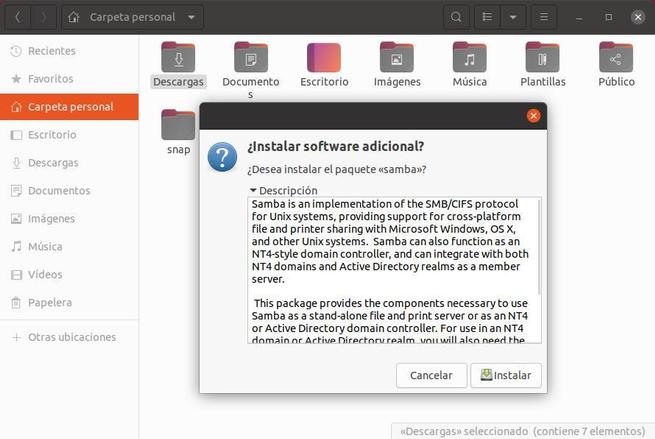
Since we are here, we recommend following the Ubuntu wizard, and we save ourselves problems.
Now we can continue. We mark the ” Share this folder ” box so that this folder is added to SAMBA and the other computers connected to the network can connect to it. We can give the folder whatever name we want, as well as a description if we want users to be able to identify it better.
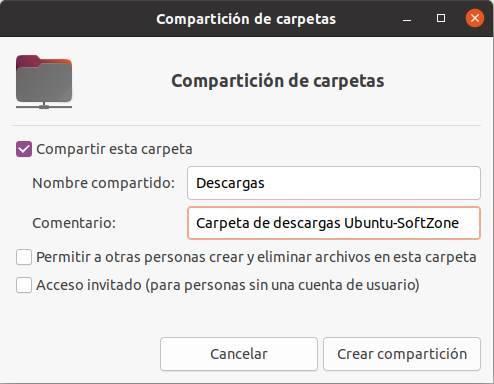
By default, Ubuntu does not allow guests to connect to the folder (that is, we will have to enter the username and password before being able to access it), and it does not allow any user to add or delete files, that is, it is from read only.
If we want anyone to be able to enter, or for users to leave us their files in this folder, we will have to check the corresponding boxes that appear at the bottom. Of course, we must ensure in this case that the users who connect are trustworthy.
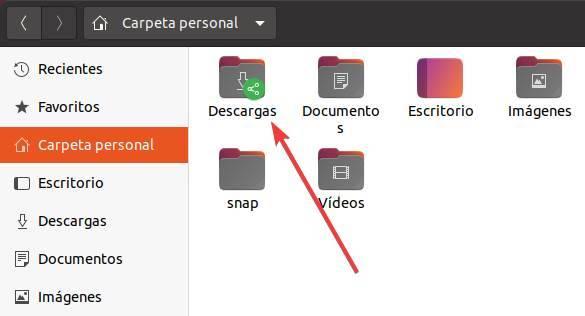
Now you just have to click on the button « Create share » and that’s it. The folder will already be shared on the network. And we can know because a new icon will appear next to it.
How to enter a Linux folder from Windows
In order to access the shared folders of Ubuntu, what we must do is open the Windows file explorer and write two backslashes in the address bar, followed by the IP of the Ubuntu computer. Namely:
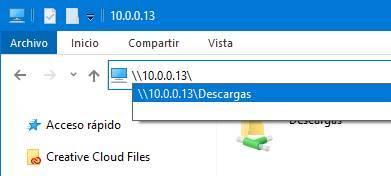
Windows will automatically find the computer, and it will list the folders that are shared from it. In addition, if we enter the computer directly, only with their IP, we can see a list with all of them.
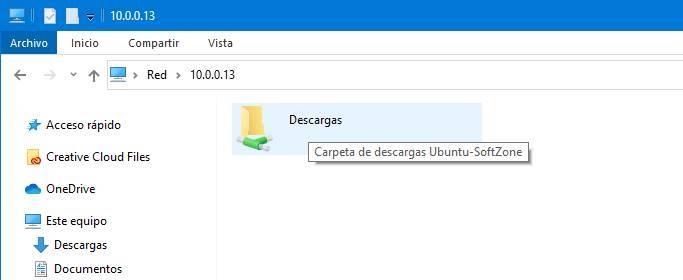
To enter the folder, all we have to do is double click on it. If we have not marked the option to allow guest access, we will have to enter the username and password of the owner of the folder or of any user with permissions (that is, those of Ubuntu).
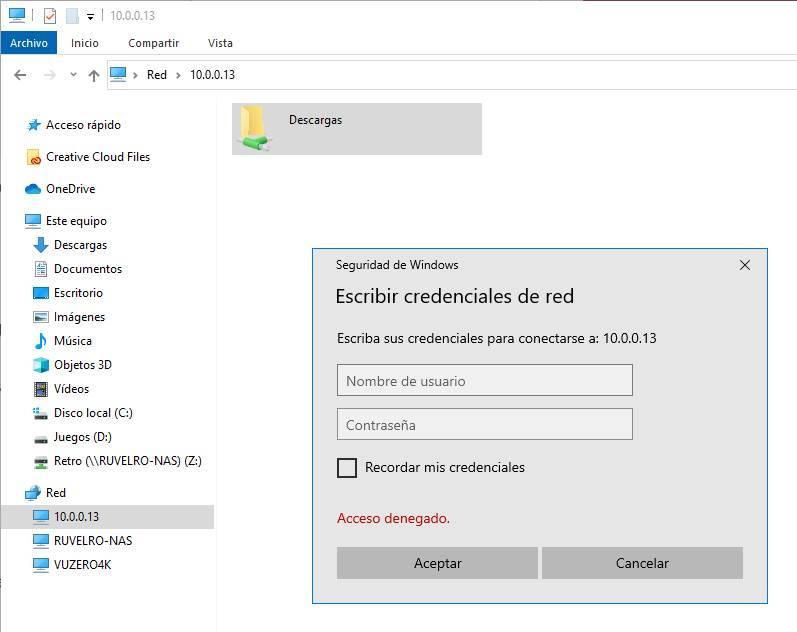
And voila, we will be inside it and we will have access to all your data. And, if we have permission, we can even copy files to it, depending on the options we have marked when creating it.
How to stop sharing a folder in Linux
When we no longer want said folder to be shared on the network, what we must do is locate the folder again, right-click on it and select ” Shared resource on local network “. We will be able to see the window from before where we mark the option of «Share this folder».
Simply by unchecking this box, the folder will no longer be shared on the network.
How to view all shared folders in SAMBA
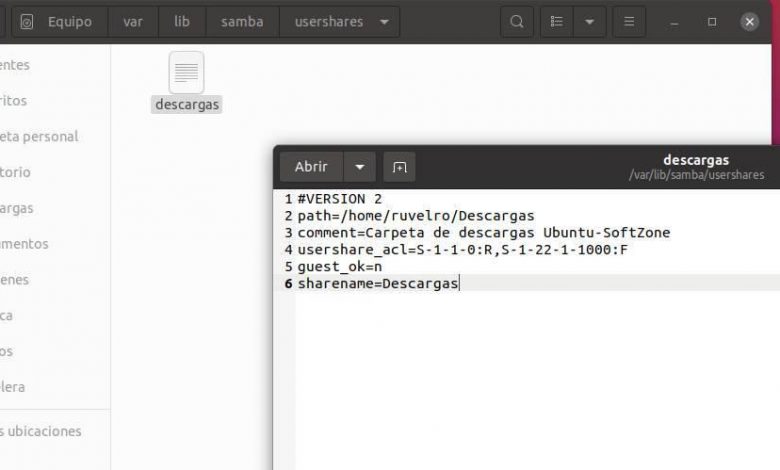
If we share only one folder, we will surely know what it is, and we can remove it when we no longer want to share it. However, if we share many folders it is easy to forget which ones we have shared on the LAN. There are many ways to see it, but the simplest, and that does not require using a terminal or installing anything, is looking for the following directory from the explorer:
/var/lib/samba/usershares
Inside here we will find a text file with each of the folders that we have shared. And if we open these files with an editor, such as gedit, we can see the path where the shared folder is located.
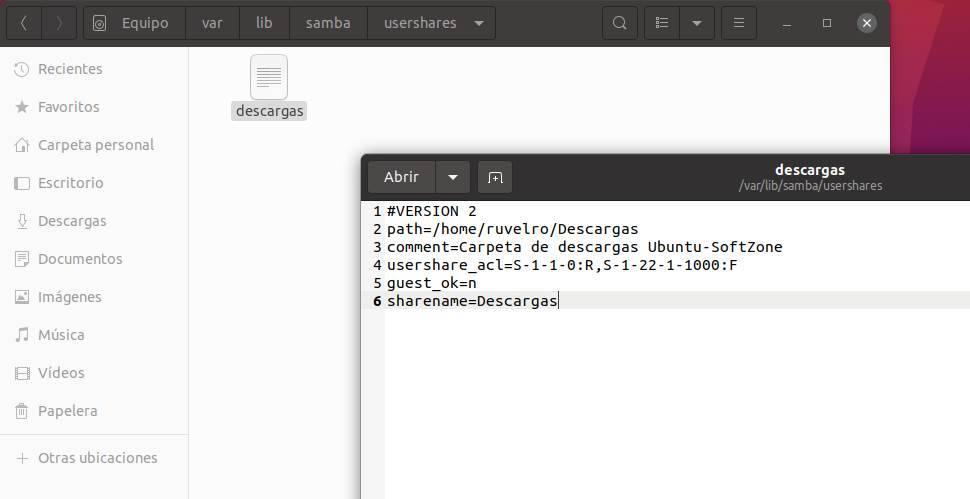
Thus, by going to this route, we can make it stop being shared on the network.