FileZilla Server: Configuration of this FTP and FTPES server for Windows
The popular FileZilla Client program, which is one of the best FTP, FTPS, FTPES and SFTP clients for Windows systems, also has a version to act as a server. With FileZilla Server we can set up an FTP and FTPES server easily and quickly in our home or in our business, with the aim of sharing files through the local network and the Internet very easily. Today in RedesZone we bring you a complete tutorial on FileZilla Server, one of the best servers for Windows.
FileZilla Server is available in a 32 or 64 bit version, but only for Microsoft operating systems from Windows 7 onwards, the latest version of Windows 10 being compatible. Thanks to this software, we can easily create our own FTP server or FTP over TLS.
As you all know, the FTP protocol does not use encryption for authentication or file transfer. For this reason, it is very important to make use of protocols such as FTPS and FTPES, to provide an encryption layer for both authentication and file transfer. If your processor uses AES-NI, the performance you will get will be similar to that of the FTP protocol, so it is always advisable to use this FTPES or FTPS security protocol to protect our data. Today, in NAS servers with an AES-NI compatible processor, we can achieve around 400MB / s speed without any problem, so if you are going to transfer data to the Internet, today we do not have connections of 4Gbps of bandwidth.
FileZilla Server is one of the most recommended programs for Windows systems, however, if you use Linux, it is better to use programs like proftpd or vsftpd which are FTP / FTPS / FTPES servers widely used all over the world.
Installing FileZilla Server on Windows
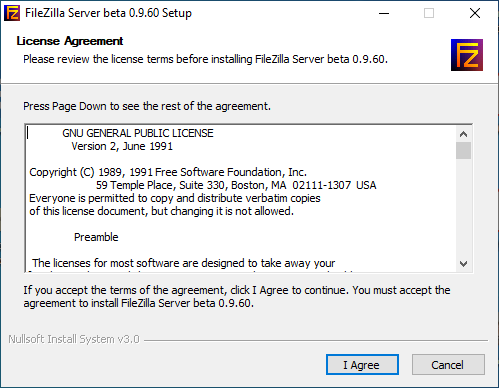
To install FileZilla Server, we must download the installer from the official FileZilla download website. Once downloaded, we must run the executable that we have downloaded, and follow its simple installation steps.
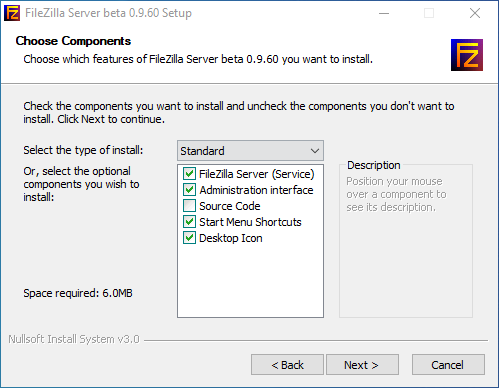
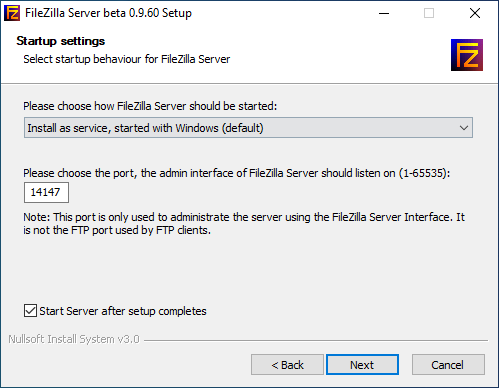
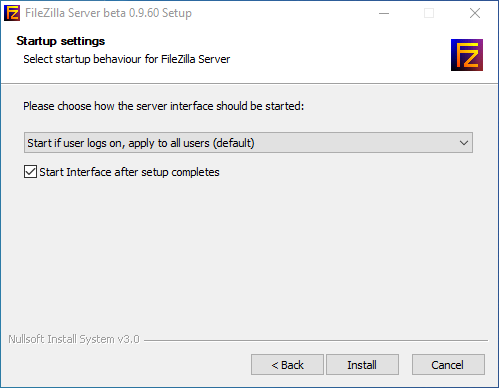
During the installation you must choose and configure several options, the first is what type of installation you want, we recommend that you leave the one that comes by default which is the ” standard “. The second you must choose which administration port FileZilla Server is going to use, and how we want it to start, that is, if by automatic service, manual or not automatically started. We recommend that you leave the default values. The third is that you must choose when you want the FileZilla Server interface to start, giving us the option to start when logging in, or to start manually. And with this, we would have FileZilla Server fully installed.
FileZilla Server Startup and Configuration
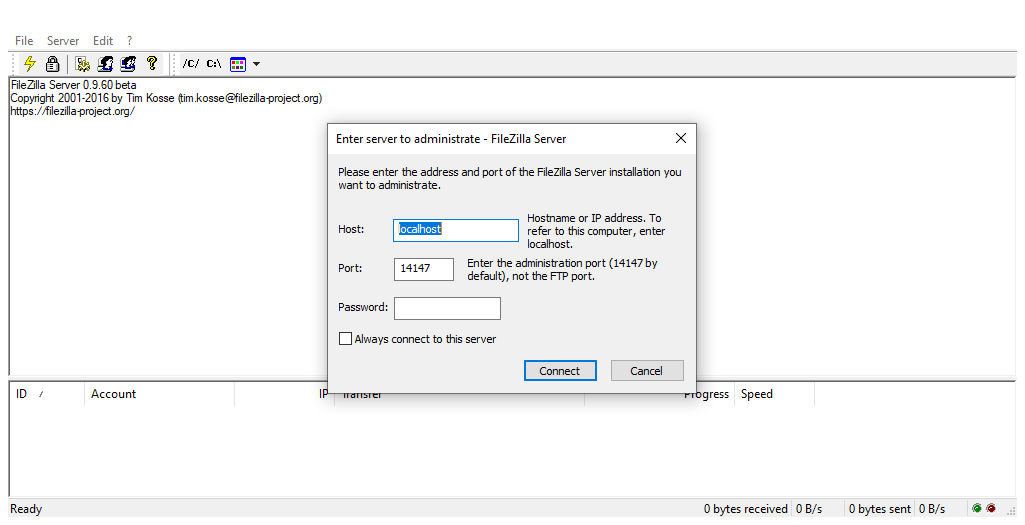
The first time we start FileZilla Server, a window will appear where we must configure various options to manage the server. The first is the name or IP address where the server is installed. If it is the same team we must enter ” localhost “. Next, we must specify the port used by the server administrator, the serial number is 14147. And finally, we must enter the access password, they do not have any entered as standard.
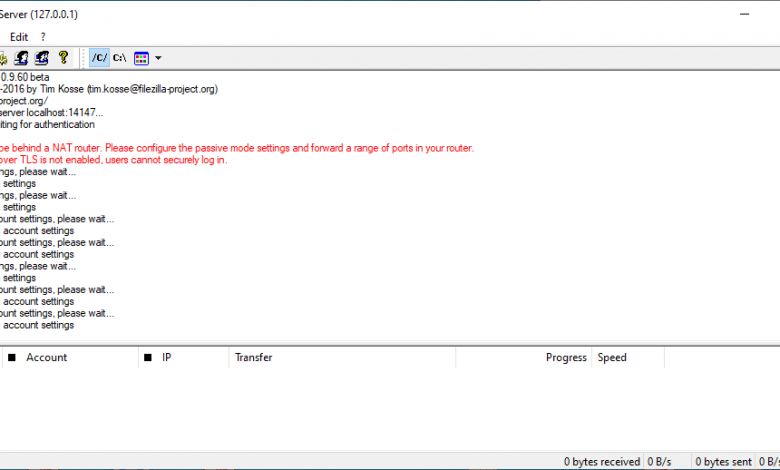
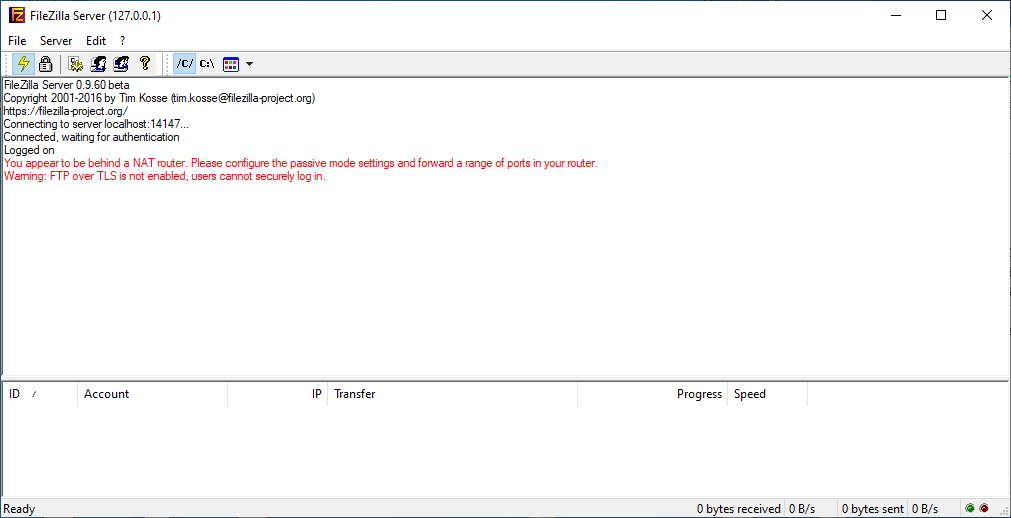
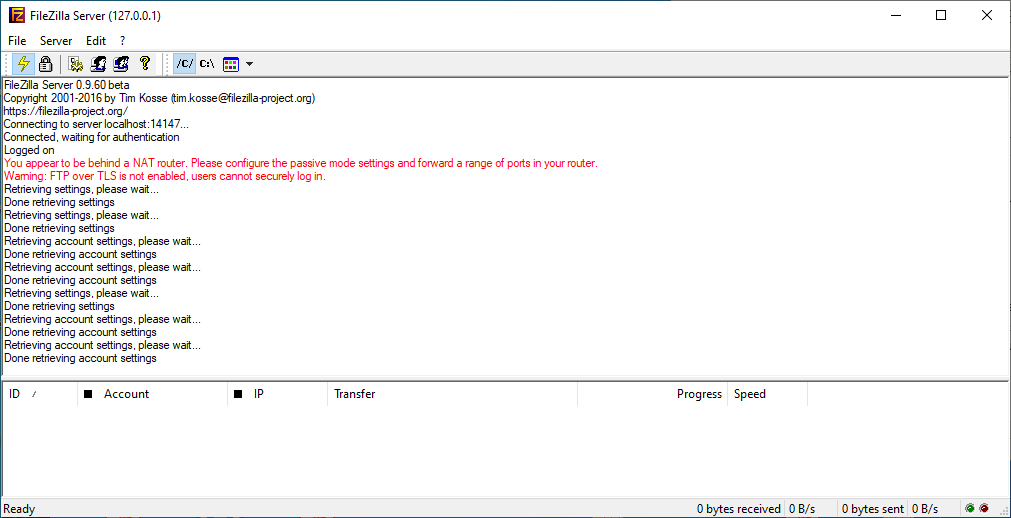
Once we have connected to the server, we can see that it is already perfectly operational. We will get a warning in red indicating that we are behind the NAT of our router, and that we must configure the FTP in passive mode, and do a port forwarding to the FTP server itself. We must remember that we not only have to “open” the control port 21 on the router, but also the PASV ports that we configure on the FileZilla Server.
It also indicates that FTP over TLS is not enabled, therefore, users will not be able to log in safely to our server, because the access credentials are sent in plain text.
Once we have configured the server administrator, we find a window without many apparent options, but which hides a large number of options. Starting with the top menu we have the following options.
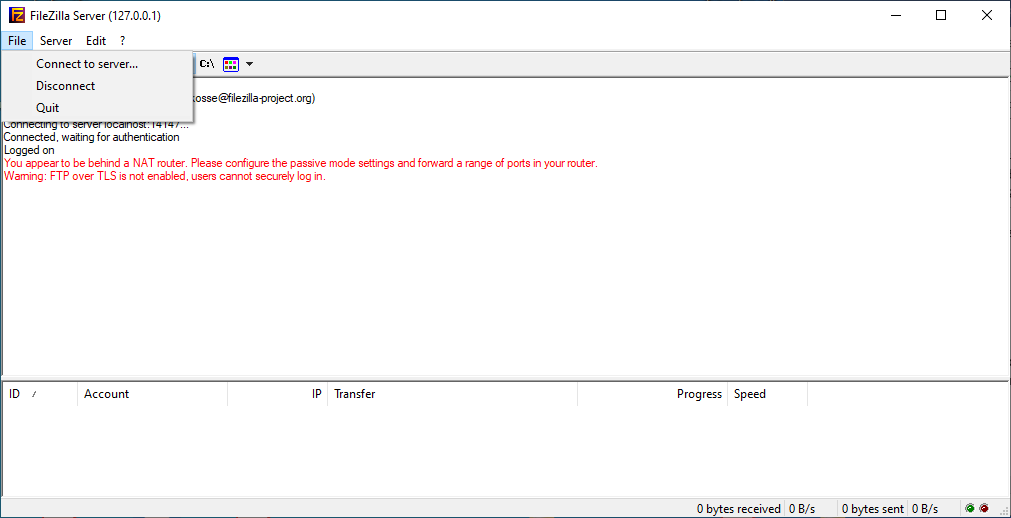
File
Within the ” File ” menu we have only three options, the first is ” connect to server “, this option is used to connect and manage another FileZilla server that we have on our network. The second option is ” disconnect ” and it is used to disconnect from the server to which we are currently connected. And the third option is “Quit” which is used to close the server.
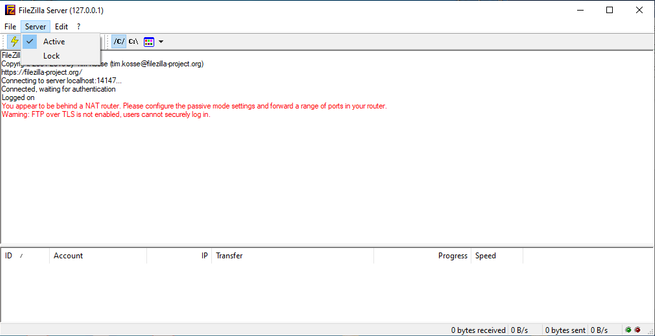
Server
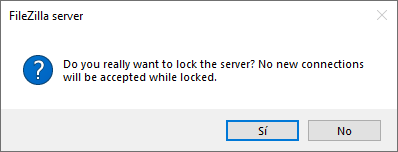
Within the “server” menu we have two options, the first “active” is to have the server active, and the second option is “Lock” and it is used to block the server and not accept more connections.
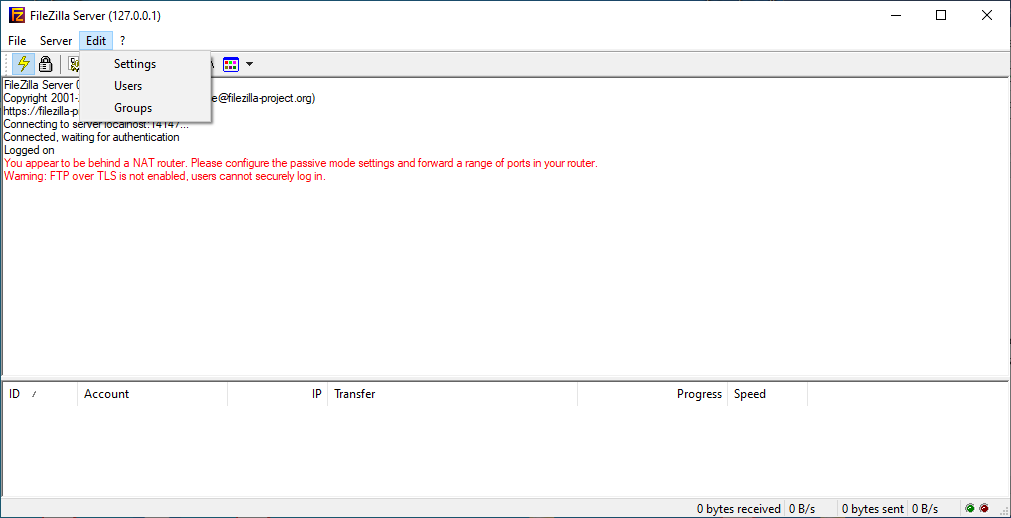
Edit
In the “Edit” section we have other options, including the “Settings” section, “Users” and also “Groups”.
 Settings
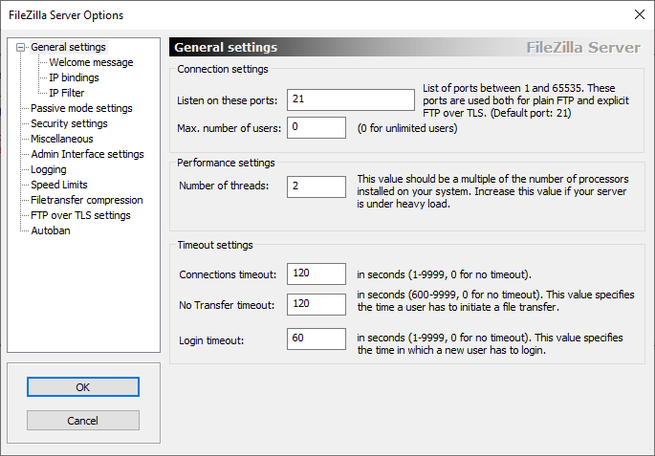
In this submenu we have it divided into several options where we are going to review the most important ones in depth.
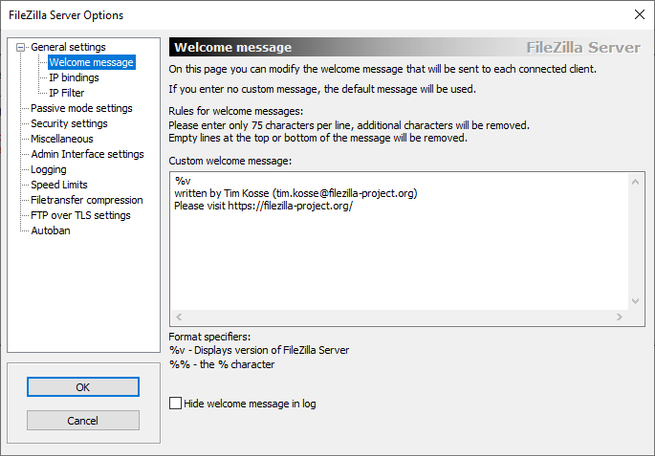
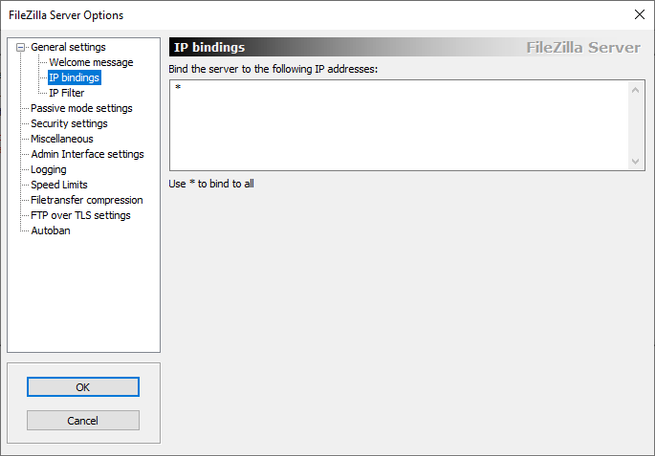
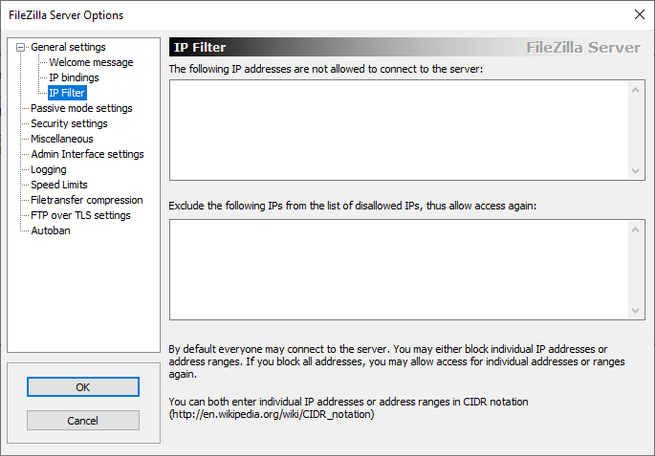
- General settings : Within this option we can configure the listening port of the FTP server, the maximum number of users that can connect at the same time, and performance and timeout options, in addition to the welcome message, and a very complete filter for access or IP blocking.
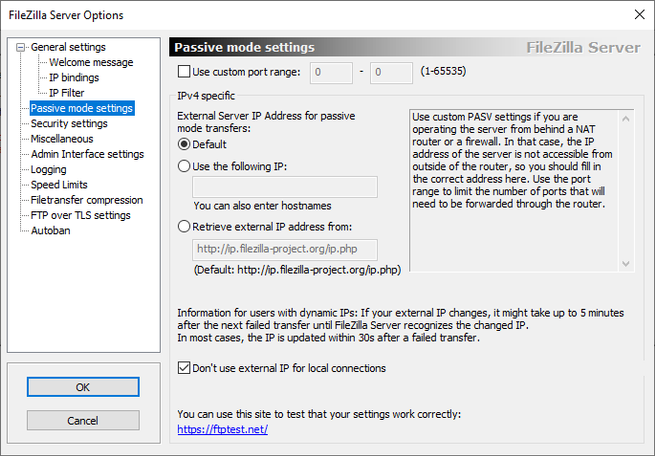
- Passive mode settings : In this option we can configure the passive FTP option of the server, it is advisable to use passive FTP if we are behind NAT. In real life, we should always choose this configuration option to ensure that it will work peer-to-peer without a hitch. We must define a custom port range, for example, from 60,000 to 61,000 TCP, and do port forwarding on the router. Likewise, we must also indicate the public IP address of our Internet connection, or the domain dyndns or no-ip.
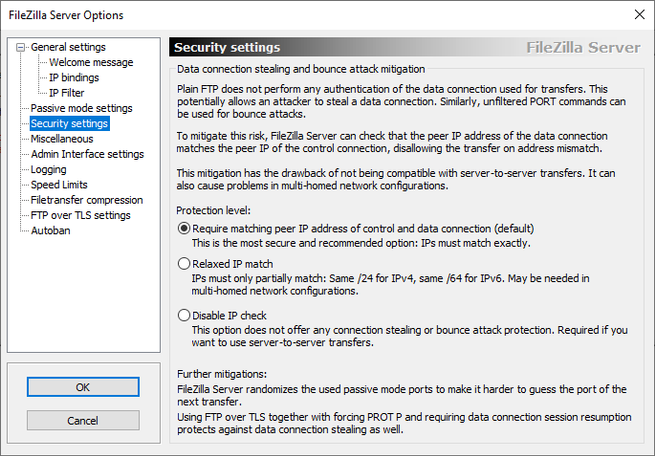
- Security settings : In this option we can configure between three options the level of security and protection that we want our server to have. From RedesZone we recommend leaving the option that comes standard and only changing it if we are very sure of the security of our network.
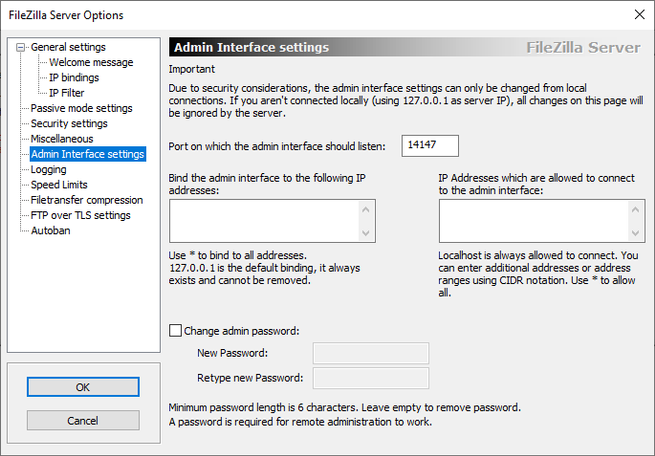
- Admin Interface settings : This option is very important since from here we can change the administration port of the server and add or change the access password. We recommend that you put a password for the administration of the server. From this option you can do it.
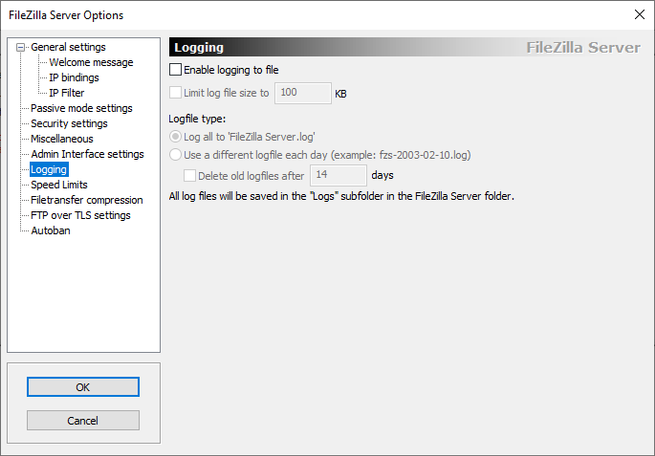
- Logging : From here you can activate the server log. It is important that you activate it if you want to have greater control of everything that happens in it.
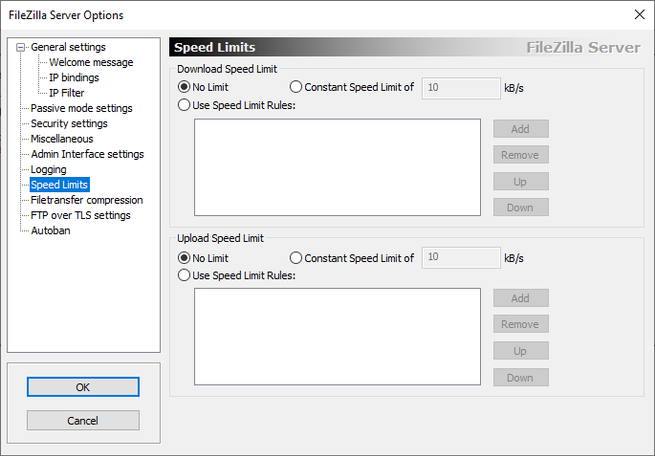
- Speed Limits : From this option we can configure and limit by ip, the speed limit to different users.
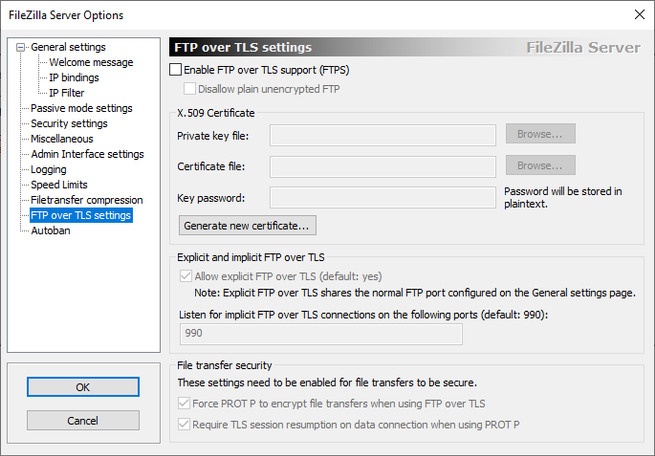
- FTP over TLS settings : If we want our ftp server to be compatible with the FTPS protocol, we must activate and configure it in this option. For this we must have or create the “X.509” certificate. In addition, we can also specify the port that the FTPS protocol will use.
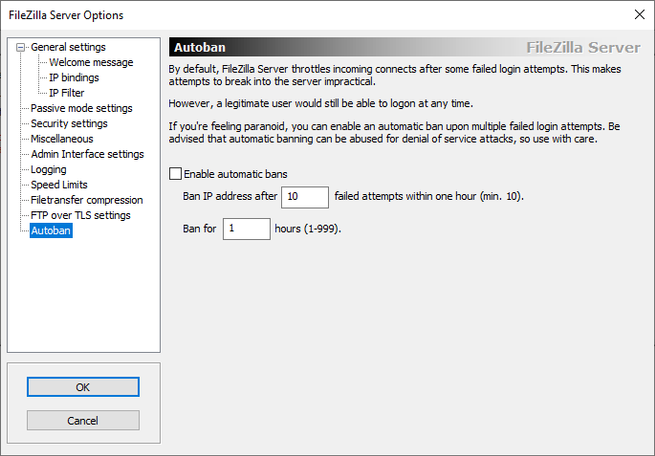
- Autoban : In this option we can activate the automatic “bans” by IP by mistake when logging in, and configure the “punishment” time.
Users
In this submenu we can configure everything related to users, for this it is divided into four more submenus.
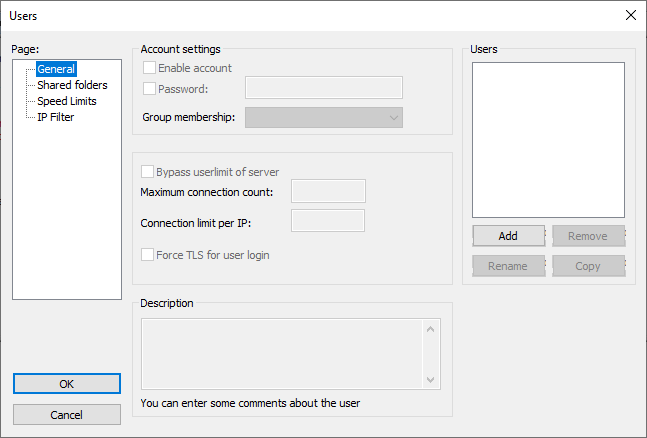
- General : In this submenu the first thing we must do is create a user using the menu on the right called “Users”, there by pressing the “Add” button we can add a new user and add it to an existing group if we have one created. In addition, we can also delete it, rename it or copy it. If we want to add a password to the created user, we must activate the “password” box and enter the password that we want to assign to it. Finally, we can configure how many connections or connections using different IPs the same user can use, and force the login using TLS.
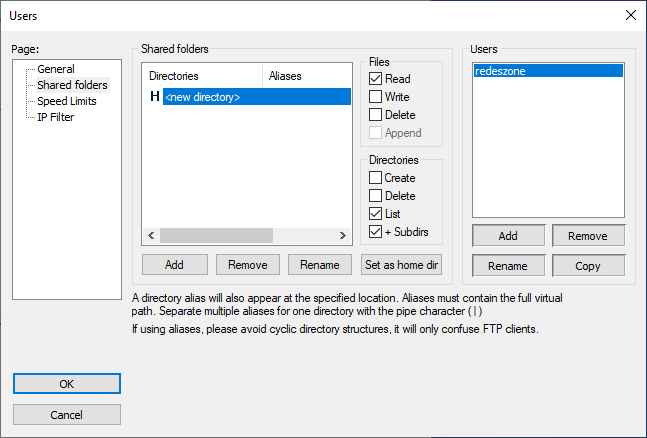
- Shared Folders : Within this submenu we can add shared folders and specify what type of permissions each user has on the directory or files inside.
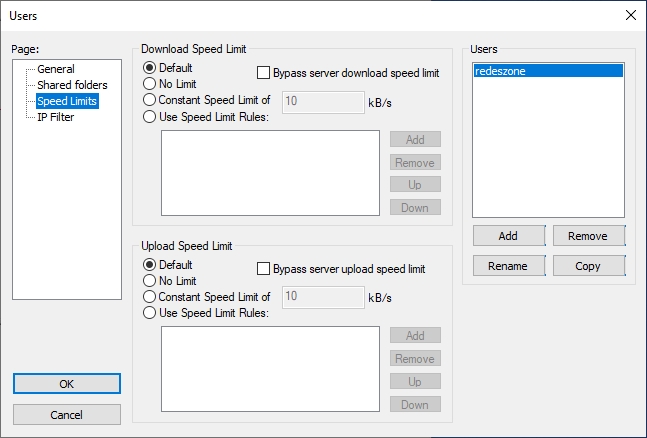
- Speed Limits : Within this submenu we can configure the download and upload speed limit limited by user.
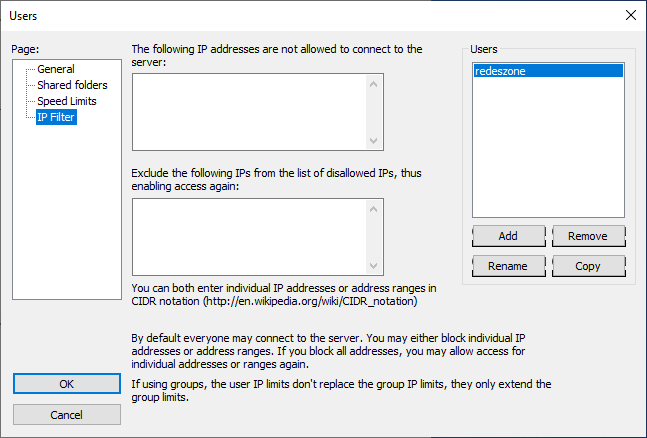
- IP Filter : Within this submenu we can configure which IP addresses have access granted or denied by user.
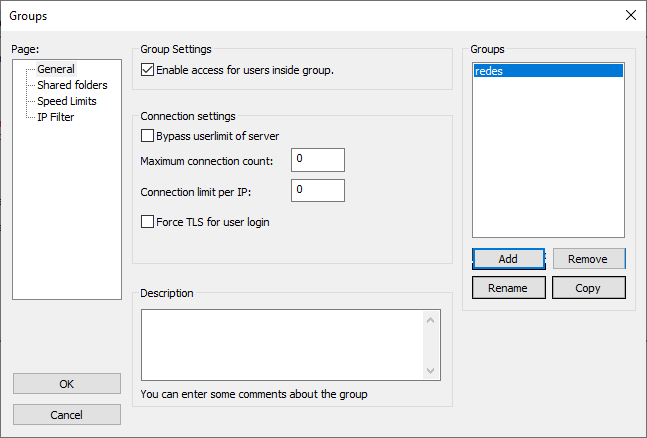
Groups
In this submenu we can configure everything related to user groups, for this it is divided into four more submenus.
- General : In this submenu the first thing we must do is create a new user group using the menu on the right called “Groups”, there by pressing the “add” button we can create a new one. In addition, we can also delete it, rename it or copy it. We can also activate whether or not users can join the created group and we can also configure how many connections or connections using different IPs the same group can use, and force the login of the users of this group to be using TLS.
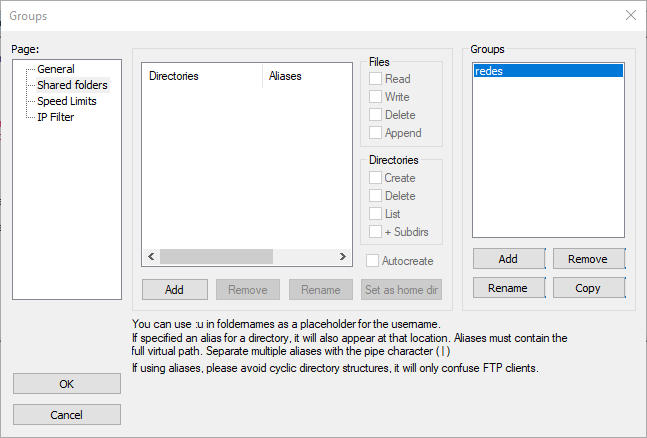
- Shared Folders : Within this submenu we can add shared folders and specify what type of permissions each group has on the directory or files that are inside, which will be applied to the users of the group.
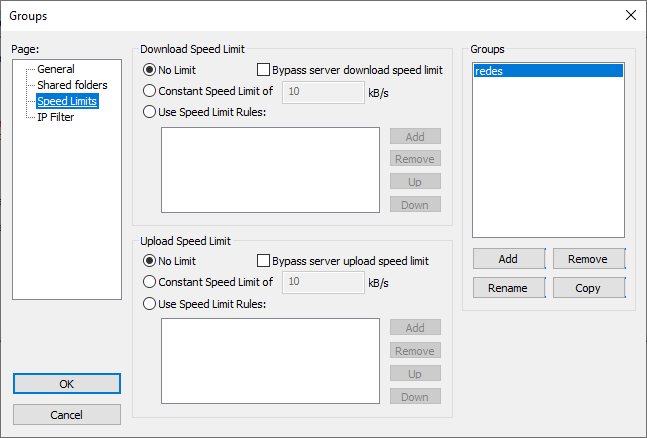
- Speed Limits : Within this submenu we can configure the download and upload speed limit limited by group.
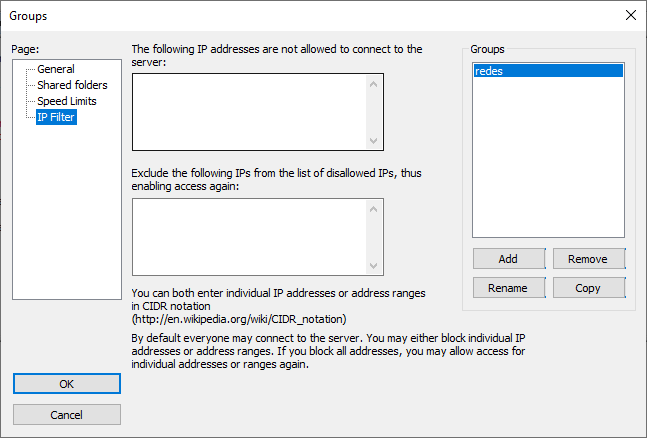
- IP Filter : Within this submenu we can configure which IP addresses have access granted or denied by group.
And these would be all the most important options in the top menu, where we can see that we have access to the most important FileZilla Server options.
Shortcuts

Below the previously seen options, we have a series of icons with shortcuts. Starting from left to right, let’s see what each option is for:
- Symbol of a lightning bolt, it serves us to connect or disconnect the server to which we are connected. It is the same option that we have in the “File” menu.
- Symbol of a padlock, it helps us to block the server and not accept new connections. It is the same option that we have in the “Server, Lock” menu.
- Symbol of a wheel, it helps us to access the FileZilla Server options, where we have the same options that we saw previously in the “Edit, Settings” menu.
- Symbol of a drawn face, it helps us to access the user options. It is the same option that we have in the menu previously seen in “Edit, Users”.
- Symbol of two drawn faces, it helps us to access the group options. It is the same option that we have in the menu previously seen in “Edit, Groups”.
- Symbol of a question mark, it helps us to access “About”, where we can see the version of the server. It is the same option that we have in the upper menu with the question mark symbol.
- The seventh option and eighth option, allows us to select how we want to see the file paths, that is, it gives us the option to see them in the following way:
- / C / redeszone /
- C: redeszone
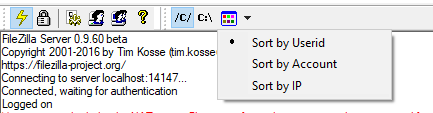
- The ninth and last option allows us to choose how we want to see the connection information, and for this we have the following three options:
- Sort by Userid: Show by user id.
- Sort by Account: Show by user account.
- Sort by IP: Show by the user’s IP.
Windows
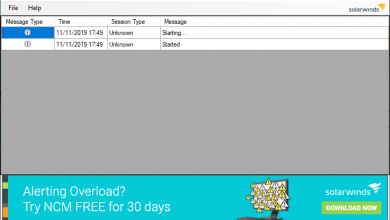
The last thing we have to see in FileZilla Server is the distribution of the windows, for this they are divided into two main windows, the first one shows us information about the server, and the second window, at the bottom, shows us the users that there are connected and their information.
As you have seen, we are facing a very complete FTP and FTPES server, but at the same time very easy to handle. Thanks to the simplicity of its options and menus, we will have no problems in starting up this server in a few minutes. This server is ideal for someone looking for something simple and quick to configure, without having to get complicated with many menus and too advanced options.