How to Create or Make the ‘Glitch’ Effect in Photoshop – Easy Steps Tutorial

Today anything is a trend, especially when we talk about photographs, and Photoshop gives us a great help , we can do a wide variety of retouching. And among so many effects, we will tell you how the Glitch Effect works , we will show you how to create it and do it easily with a few steps, so keep reading.
How to create or make the Glitch Effect in Photoshop
If you want to get that professional and artistic effect with Photoshop you can find several editing tools, and the Glitch Effect will give you that perfect touch. In the graphic world we can do many things, and with this effect an image can be perfectly imperfect, logically you must have the Photoshop Program.
Visually we expose a sense of movement, so before perfecting the use of this function, make all possible attempts, until you achieve the desired one. You do not have to be a professional graphic designer to achieve this job, you just have to carefully follow the following steps that we will show you later.
What is the Glitch Effect?
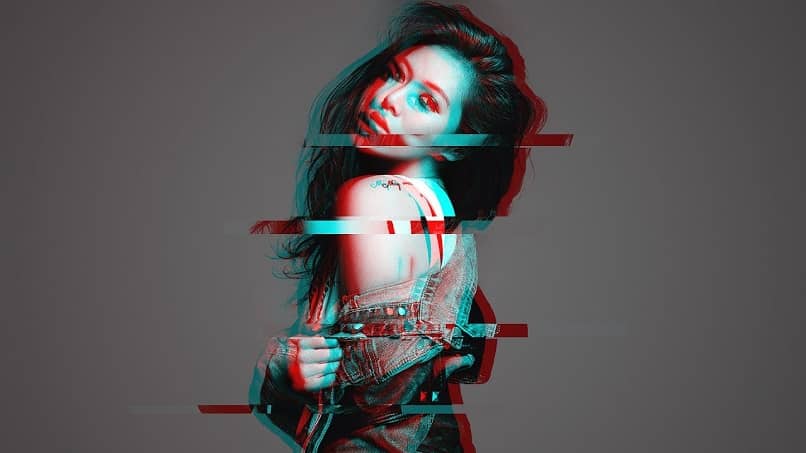
It is that visual effect, that the image is an error, usually very reminiscent of a VHS error or in a video game. In a photograph it gives the impression of error, what was previously a headache is now fashion, widely used on social networks.
Tutorial in easy steps
- Select the image or photograph you want to edit from the image library or from the folder where you have the images saved.
- Choose the settings you want to make, such as the contrast among others that you will find in the menu.
- Make a duplicate of the original image for you to keep and make changes to the replica, so you have two layers of the image .

- Select Rectangular Frame to make strokes of different widths on the image, these are the places where you will make the Glitch.
- You click on Filters and select Distort, then Square and in waves you choose the values you prefer and add the changes.
- Now you can make the distortions using the same Rectangular Marquee tool, giving elongations as desired, giving a realistic effect. The strokes can be vertical or horizontal, it will depend on your taste or if the image you chose suits that effect.
- Always use the Move tool, to move the strokes of the image that were not selected to give the effect of error.
- You can repeat the distortions, changing the wave types.
- To combine the layers, press the Ctrl, Shift, Alt and E keys at the same time .
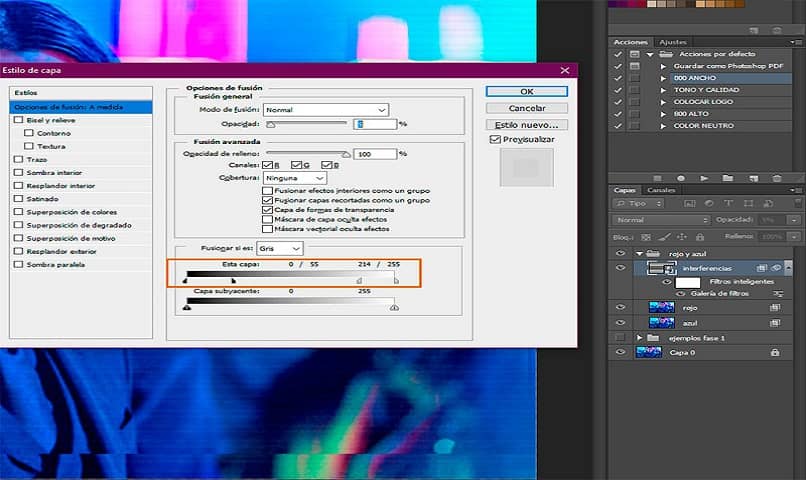
- In the lower right we find fx , select Blending Options, you will open a Layer Style tab , and in Advanced Blending to make more adjustments. Here you can disable the blue and green channels, just leave the red one to move the image.
- If you want to add the texture layer, you must create another layer and you are going to Fill and in Content we select the white color. Then by right clicking, you select Convert to Smart Object, and in Filters choose Sketch and in Halftone Model and do whatever adjustment you want.
- Type of Motif: In this option you decide what Size, Contrast and Lines you can make.
- If you notice that there are background lines, you can solve it by going to Layer Mode and clicking on Overlay and also adjust the Opacity of the image.
- To finish you hit Ok and that’s it.
recommendations
Let us emphasize that although it is an easy design editing task to perform, if things are not done well, you will not have the desired results.
- Be very calm the moment you go to use the program for the first time.
- If the image quality is of good resolution, the Glitch Effect will be better.
- For best results in terms of contrast, it is recommended to have an image with a white background or another similar color .
- If you see that when making a length or amplitude modification, you will always have the original image saved to reuse and keep trying.
- Do not abuse the filters, so as not to distort the image in such a way that it loses that professional Glitch Effect.

Show your artistic potential, using Photoshop and its image editing tools, such as the paper strip effect , create, design and share now.


