How to add or put webcam, text, frames and overlays in OBS
It is OBS Studios, the most used program for streaming on YouTube and the other pages we mentioned. This program allows you to edit the transmission at will, adding special effects, frames, texts, overlays and much more. Find out how to add them to your broadcasts here in this article.
Add the webcam in OBS
Image is very important for a successful live broadcast. That is why the camera that we use for the transmissions must be of quality, so be sure to configure the resolution of the camera on your mobile. But if not, don’t worry, you can still use these steps to add any webcam in OBS.
The first thing you should do is run your OBS studies and have it configured for live transmission, then in the “Sources” section, click on the plus symbol (+). Options will be displayed, we must select “Video Capture”.
Automatically a sale will be displayed where the first option is to assign a name to the source. We put the name we want and then click on the “OK” button.
It is important to remember that from now on you must have the camera connected to the computer and configured correctly. This includes the corresponding drivers for use on your computer. You can also record your computer screen with OBS Studio.
That said, let’s continue with the steps. In the next window, we can configure the camera, as well as its resolution. From here on, it will be left to configure it to your liking, we end in “accept” and that’s it.
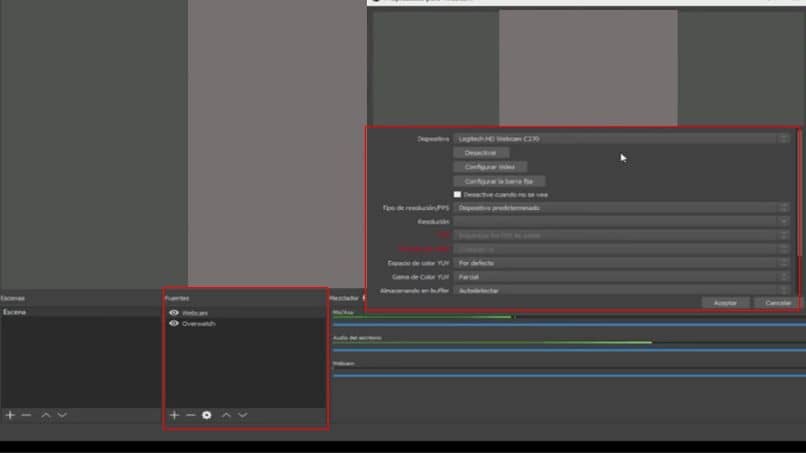
On the main screen, we can see the camera placed on top of the streaming. With the red buttons that are in the corners of the camera we can adjust the size and position within the streaming.
It’s that easy to configure and add the camera to OBS Studios for a live broadcast. Now, to add more effects and a little more professional aesthetics, we must add overlays. How do we do it? Easily.
Put text and overlays in OBS
The overlys are basically images that we can add to our streaming to give it an original touch. Before adding it, we must download the image, frame or any logo you want.
We can have custom logos of our channel, company or any other logo that represents us. Make sure you choose well and if you already have it, let’s go through the steps to add overlays and texts in OBS Studios.
Steps to put text and overlays
The first thing we must do is know the save path where the image to be added will be. This refers to the folder where it will be, in case of downloading the image from the internet, by default it will appear in the downloads folder.
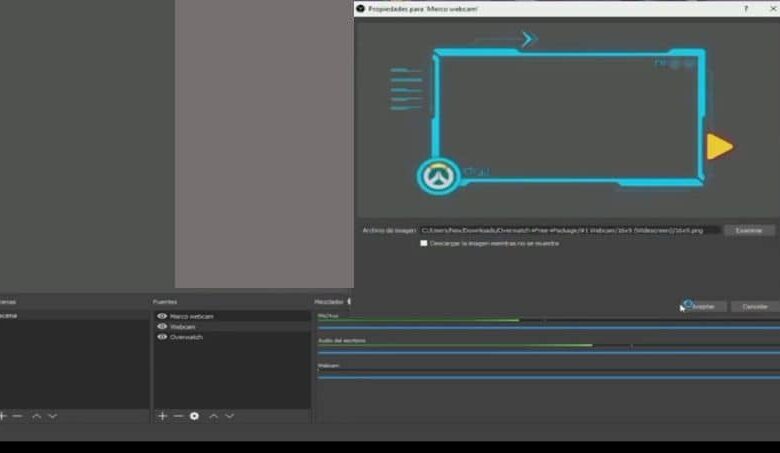
To add a frame to our webcam inside OBS Studios. We will click on the plus symbol (+) located in the “sources” section. In the list of options, we must click on “image” and a window will appear asking us to name the font that we will add. When placing the name, we end up with the “accept” button.
Another window will open. In it we must select the image we want to place (in this case it will be a frame). You must click on the “browse” button and then select the image you want to add.
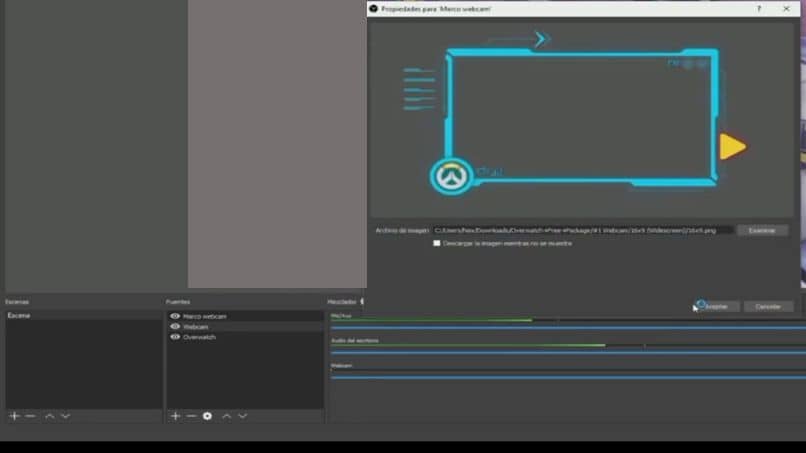
When adding the image, we will click on the “accept” button and then on the main screen we will see the added image. We will resize this frame to fit right where the camera is.
To add text, we will do the similar steps. Click on the plus symbol (+) where the sources section is. We select the “text” option from the list, assign a name to the entry and then write whatever we want.
That’s how easy we can customize our streaming using this incredible OBS program. So versatile that you could even record LoL with it without any lag. If you liked this article, share it with your friends and leave us your opinion in the comment box.

