Digital certificates: how to view and delete them in windows 10
Digital certificates are small files that contain a series of personal and private information (our data, access credentials, etc.) that is used to identify us through the Internet so that our identity can be verified and we can make all kinds of queries and procedures through the Internet. When we install a certificate in Windows 10, it is installed in a secure section within the operating system. This way it will stay there and, when an application needs it, it will request access to it to be able to use it.
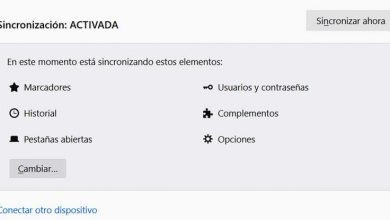
One of the most common uses of these certificates is to use them in Google Chrome to facilitate our procedures, for example, in the Treasury or in the DGT, among other things.
In addition to the ones we install ourselves, many applications install their own certificates to be able to make changes to the computer. These serve to ensure that the application is legitimate and trustworthy. And they are also used to sign the traffic that is exchanged with the servers to, for example, download updates in the background.
Even Windows has its own root certificates that make the operating system work normally and functions, such as Windows Update, can be used safely. But first of all, what we must be more than clear about is what a digital certificate really is on our computer, and what that means.
What is a digital certificate?
Well, to give us a rough idea of all this, we will tell you that a digital certificate is a means that guarantees the identity of a person on the Internet. That is why more and more platforms and websites request it, because it is mandatory when carrying out certain procedures, for example with the Administration.
In fact, in the digital and Internet age in which we have been for years, for certain people and companies, it is something fundamental. Therefore, at this time many must already have a digital certificate to present a series of important documents electronically. In short, a digital certificate is a digital document that allows people or companies to be identified on the Internet.
As you can imagine, it contains our identifying details, which have also had to be authenticated by an official body previously. This element to which we refer allows us to carry out the electronic signature of documents in a way that ensures the identity of that person or entity. Hence their importance in these times, and that we know how to use and manage them in the most correct way.
For all that has been said, in these same lines we will show you how you can see the ones you have installed on your Windows 10-based computer, as well as manage them.
How to install a digital certificate in Windows
Installing a new digital certificate in Windows is pretty straightforward. It is not necessary to navigate through different menus looking for the way to import it, but Microsoft allows us to make it ready by double clicking on it, after completing a simple and quick wizard.
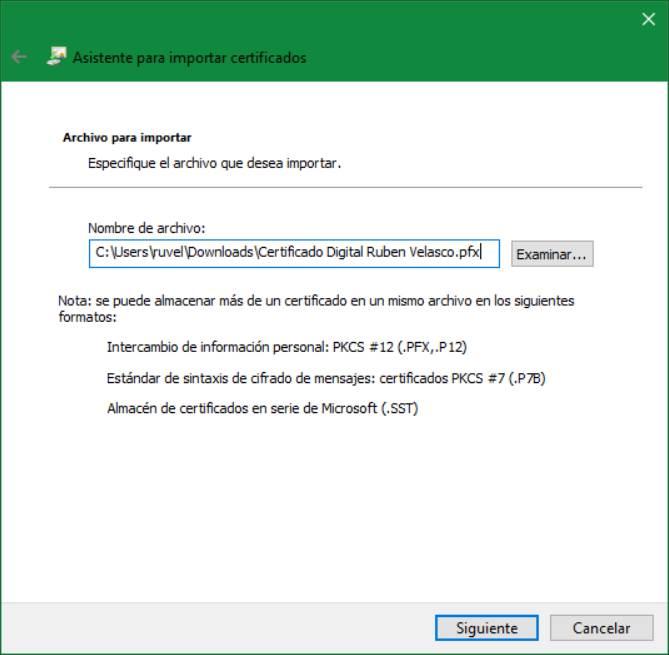
The digital certificate will be in .pfx format. When we have it located, we will have to double click on it to see the first window of the wizard.
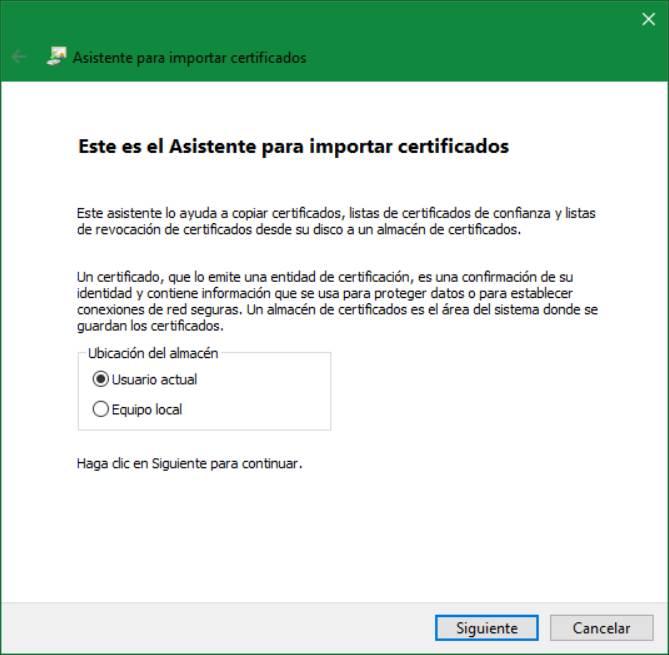
In this first window we will have to choose if we want the certificate to be installed for our user (only we can use it), or for our entire team. For safety, it is advisable to choose the first option. This is something that is especially important in the case that there are several users who normally use this same computer.
Next, we will have to verify that the certificate we are importing is the one we really want to add to the system. In addition, it will explain the difference between the different types of certificates.
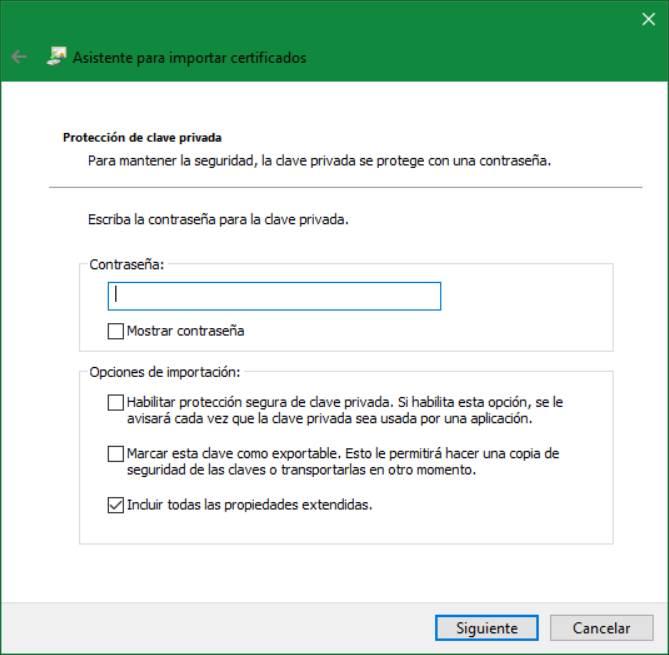
We continue with the assistant and we will arrive at a new section. In it, Windows will ask us for the password with which the digital certificate is protected. This is a standard security measure to prevent someone stealing it from installing and using it on other computers. We will also be able to configure a series of additional import options.
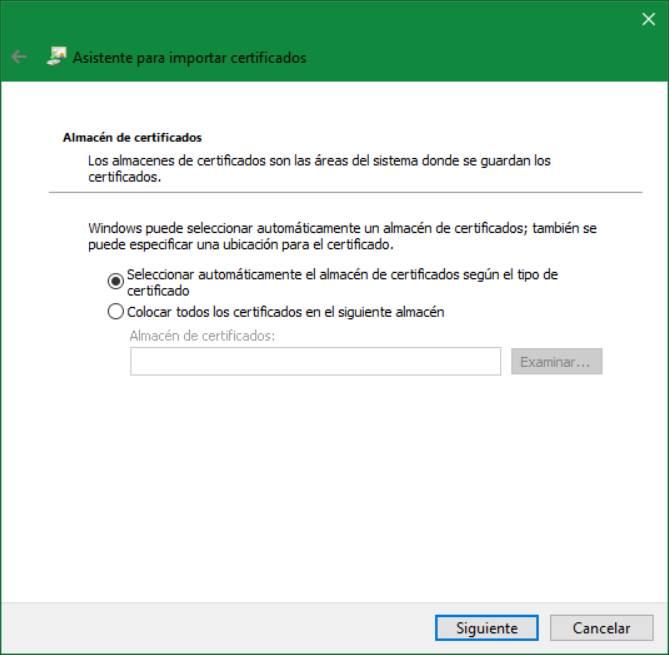
We continue with the import wizard and now the wizard will ask us in which store we want to save our certificate. We can leave the default option checked or choose the warehouse ourselves. It is best to let Windows manage them itself.
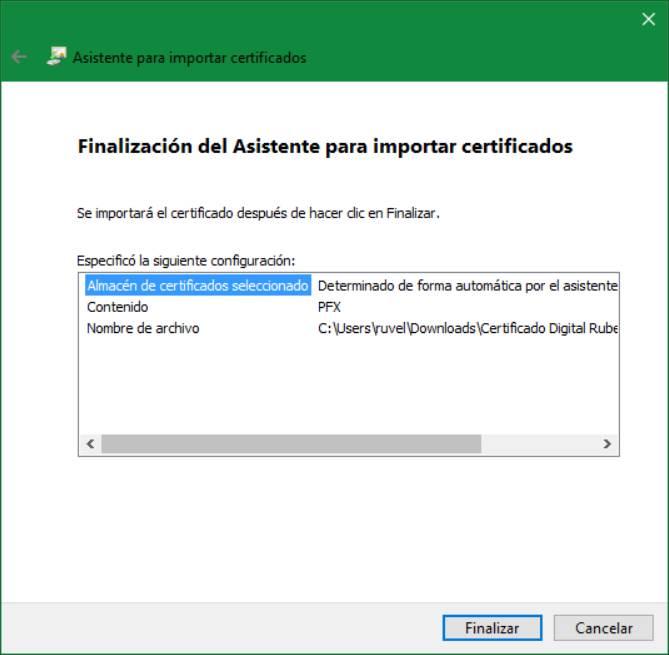
Click on next and we will see a summary with the options of our certificate. If everything is correct, we will click on «Finish» and the import of the digital certificate in Windows will finish.
If we want to use the certificate in another browser, such as Firefox, that cannot read the system certificates, then we must manually import them into it. And it is that as a general rule, depending on the software that we use to move around the Internet, these digital elements that we are talking about, we will have to manipulate them from the software itself.
How to view installed digital certificates in Windows 10
All digital certificates that are installed in Windows are stored within the certificate manager. In this way, applications know where to look for a certificate when they need to use it.
View equipment certificates
If we are system administrators, we can consult all these certificates using the certlm tool. To do this, we will simply open the Cortana search bar and execute the command «certlm.msc» in it.
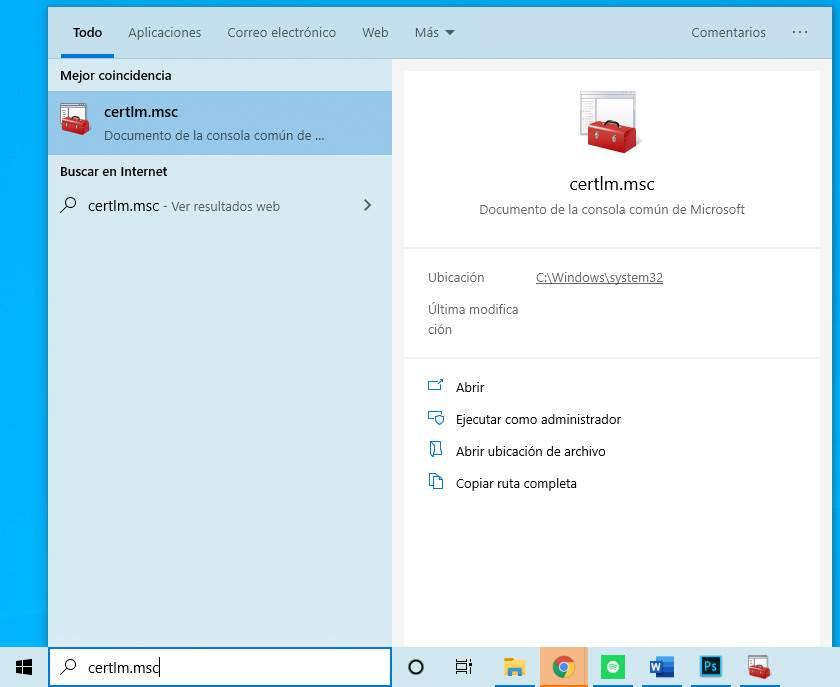
The window of this administrator will automatically open, where we can see all those installed on the computer.
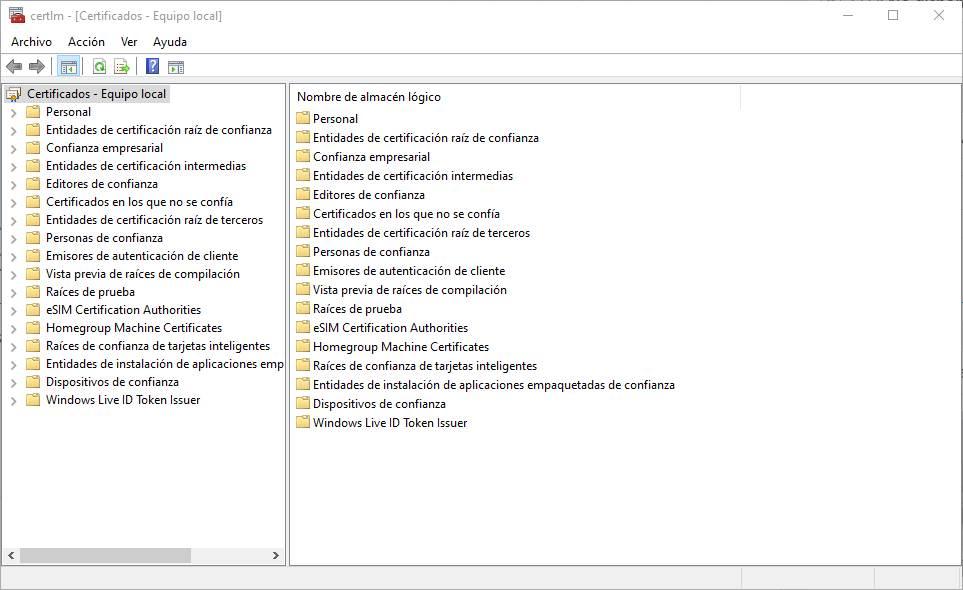
As we can see, here we are going to find different categories. Depending on the purpose of each certificate, it will be stored in one directory or another.
View user personal certificates
The certificates that we have seen in the previous point are the certificates of the equipment, generated by Microsoft and other developers for the correct functioning of the computer. These are available to all users.
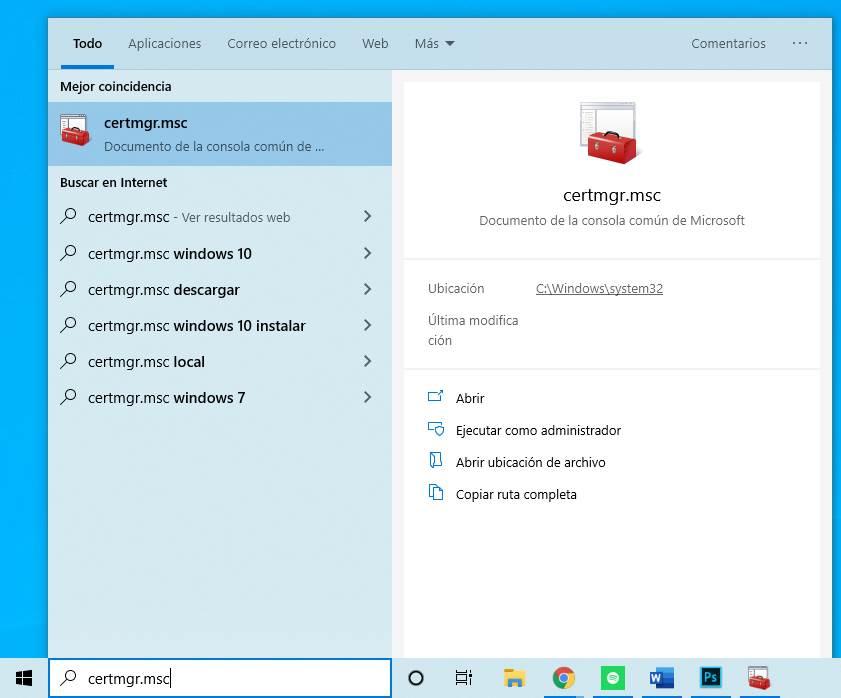
In case we want to see the personal certificates, which are only available to our user, what we must do is execute the command «certmgr.msc» from Cortana to open this personal certificate manager.
A window similar to the previous one will open, with the difference that in this we will find all the personal certificates, which are exclusive to our user. Specifically, inside the “Personal” folder we are going to find all of these.
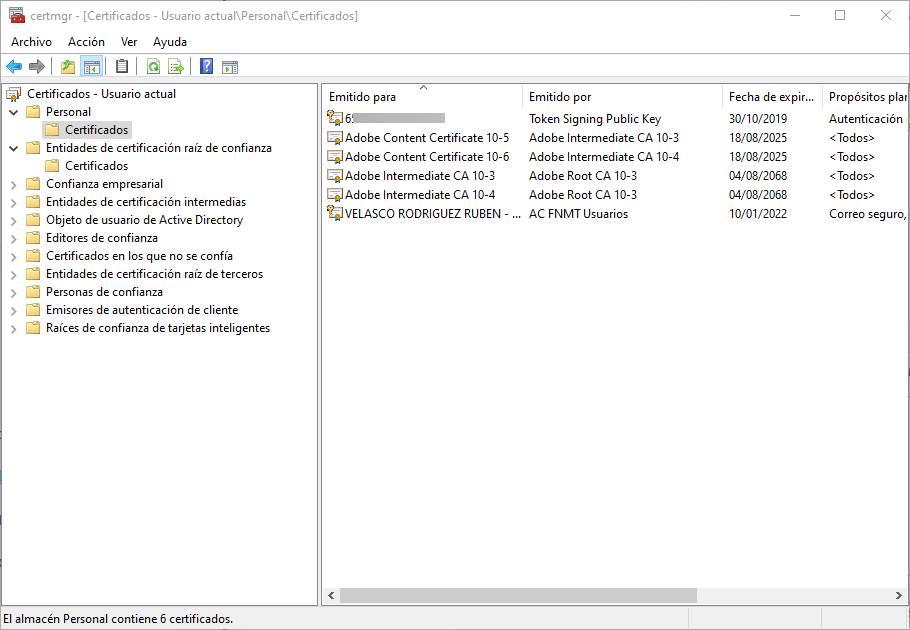
Apps that are installed exclusively for the Windows 10 user will copy their certificates here. The same happens, for example, with work certificates or the FNMT certificate that we can use to see our data from the Treasury or the DGT.
Different types of certificates that we can add to Windows
As we have just mentioned, in a simple way we have the possibility to see the certificates, both our own and those of the system, which Windows includes . This is something that we achieve, for example, by pressing the Win + R key combination and using the certmgr.msc command , as we mentioned before. This will lead us to a new window in which in the first instance we find the categories that the system itself proposes in this case. They will be of great help to us when it comes to locating certain specific certificates in a faster and more efficient way.
Therefore, these categories are found in the left pane of the Current User Certificates window . Here we will see sections on the importance of personal certificates, business trust, client authentication, those that we cannot delete, those of other trusted persons, or that of inermed entities, among others. So we only have to click on each of them in order to access the corresponding content.
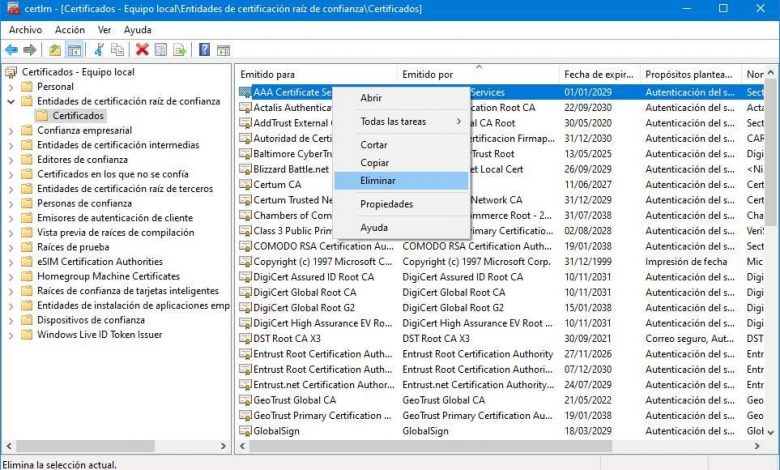
How to uninstall or delete a certificate
Here we will be able to find all the certificates installed on the computer. A certificate allows any program to have control over our equipment. Therefore, in case we do not want a certain manufacturer to be able to make changes to the system, we can uninstall its certificate.
Of course, we recommend not deleting Windows certificates like crazy, since if we delete something that we should not our computer, it could start to malfunction. We can also make many applications stop working, or some security measures (such as automatic updates) do not work.
Despite this, if we want to delete a certificate, all we have to do is, from the previous window, select the certificate we want to delete, right-click on it and choose the option to delete certificate.
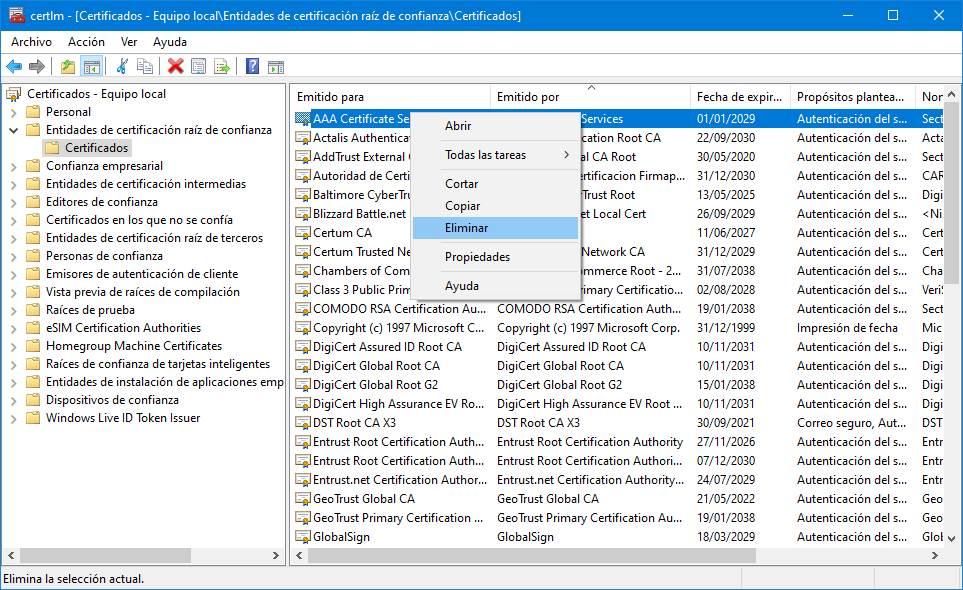
This certificate will disappear from the system, and will automatically become unavailable for Windows and any other application.
The process is the same if you want to delete a user certificate in Windows 10, with the difference that instead of doing it from “certlm” we will do it from “certmgr”, as we have explained in the previous point. Therefore, as we have been able to verify first-hand, the good treatment of these digital certificates can be very helpful in these times.