How to move Minecraft to another drive in Windows 10
Games are regularly large in size, and many people prefer to install them on their secondary drives, that is, where the operating system is not installed. This is especially useful if you are using an SSD and HDD and want to get the most out of it. When you install games from the Microsoft Store, they are installed on drive C by default. If you have installed Minecraft from the Microsoft Store you can move it to a different drive.
Here we show you how you can move Minecraft to a different drive in Windows 10.
Move Minecraft to another drive
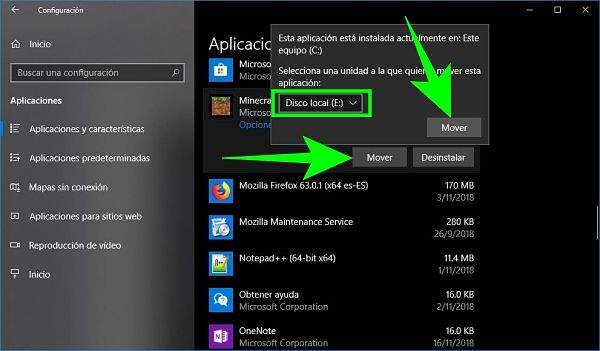
Open the Settings app and go to the Applications group . Wait for the list of installed apps to complete, scroll down and find Minecraft. Click on the application and the Move button will appear . Click on it and a small menu will open where you can select a unit to move Minecraft to.
The drive that Minecraft is installed on will not be displayed. Select the drive and click Move.
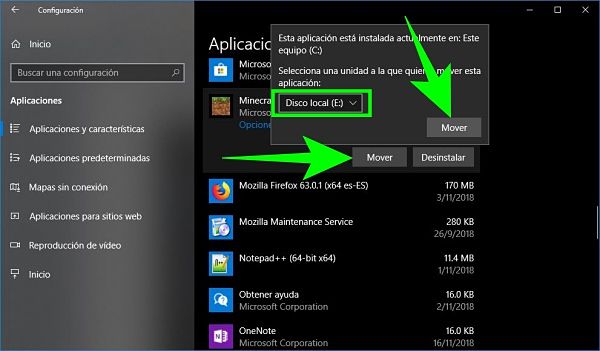
In case of having the game open, you should close it. If you don’t, the system will force it to close. Moving the application does not take long.
When Minecraft or any universal app is moved to a non-Windows drive, a folder called WindowsApps will be created on the destination drive. You will not be able to access this folder without administrator rights.
After moving the app, Minecraft should work fine. The move does not delete the folders that the application created in the AppData folder. If you require it in the future, you can move the game back to unit C or to any other unit. The process is the same.
This only works for Universal Apps (UWP). This means that if you installed the Java version of Minecraft, you will not be able to move it using the Settings application. In this case you will have to use other applications to make the transfer, or simply uninstall and install again and selecting a different location. It’s easy to back up your worlds so you don’t lose anything.

