NuCom NU-GAN5: Pepephone ADSL ADSL2 + router configuration manual
The NuCom NU-GAN5 router is the equipment that Pepephone sells with its ADSL service. By default it is configured to connect it to the light and start working automatically, without having to configure the ADSL2 + router with the Pepephone parameters. However, we may want to make some changes to the default settings. In this manual we are going to show you which configurations are interesting to make to the NuCOM NU-GAN5 router to get the most out of the Pepephone ADSL service.
Along with the router, there is a small start-up guide for the equipment with the basic configurations to put it to work, we are going to go further and show you the advanced configurations that this router incorporates.
![]()
Once we have connected the power cable and we have connected to the router by ethernet cable, we must put the following in the browser:
http://192.168.1.1
The default username and password is: admin / admin

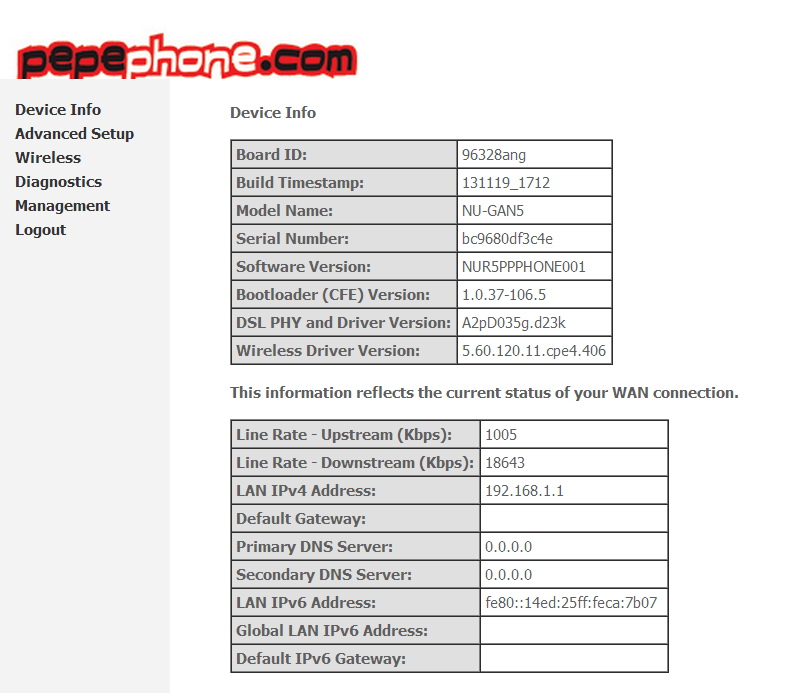
The main screen of the router where we see the main configurations is the following:
ADSL2 + Synchronization: Attenuation and SNR
To look at the ADSL2 + synchronization statistics with the attenuation parameters, SNR etc. We must go to Device Info / Statistics / xDSL and the following screen will appear:

In this screen we know all the details of our synchronization, if at any time we have a low speed problem, we must look at this screen to know what is happening and ask for help in the ADSLZone forums or directly to Pepephone technical support.
Internet settings
The Internet configuration is configured by default for Pepephone ADSL, just by turning on the router and connecting it to the ADSL line we will have an Internet connection. The Internet LED on the router must light green to have Internet access. We do not need to do any additional configuration.
We would like to highlight that Pepephone has activated the SRA (Seamless Rate Adaptation) option that allows adapting the synchronization speed without producing a cut-off, in this way, if the ADSL line is affected by interference or weather, the router will automatically adjust the speed to not produce a cut and a re-sync. If we have synchronization problems, it is recommended to disable this option as some DSLAMs are not supported.
Note: Users are advised to set the DNS settings of the routers to “Automatic”. If we set the DNS to automatic, the DNS that by default are assigned from the network will be used and not the central DNS that could have higher latency due to being further away from the user.
To carry out this configuration, just go to “WAN Service” and edit the default configuration by setting the DNS to be obtained automatically.
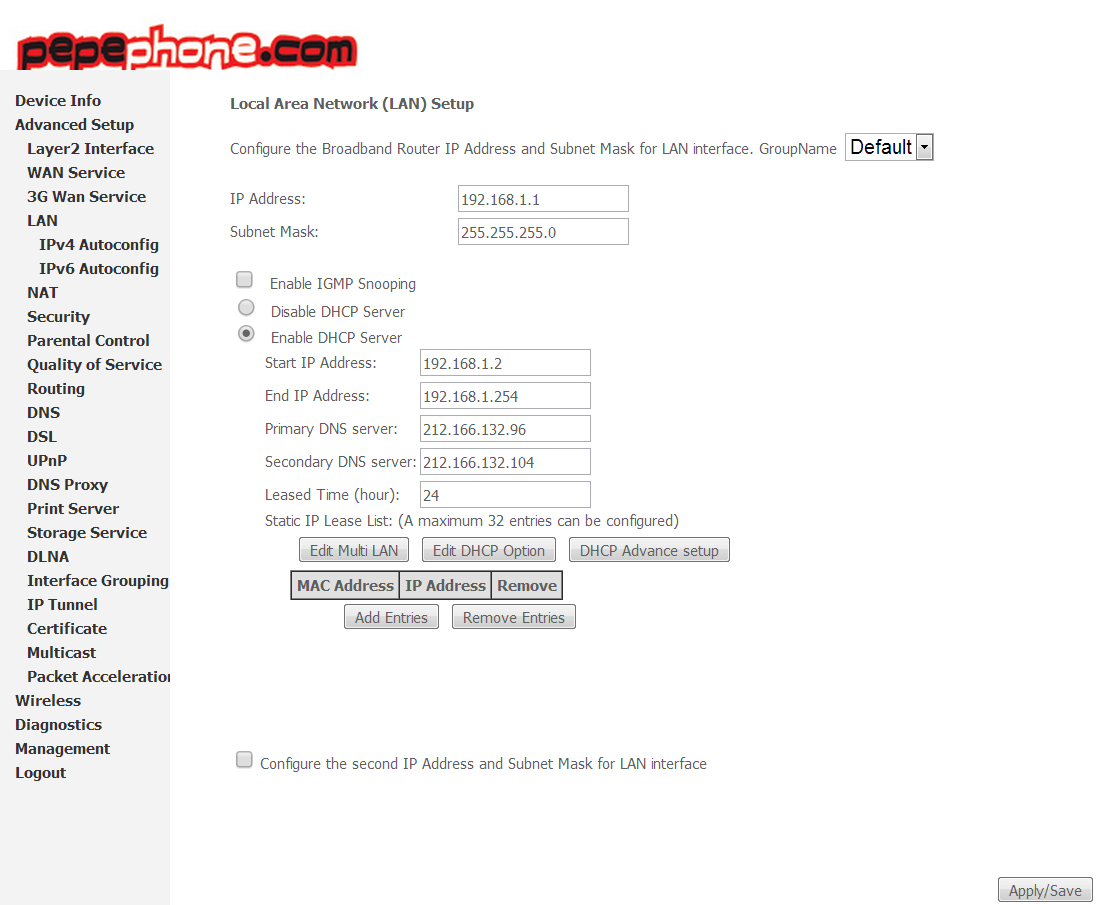
LAN and Static DHCP Configuration
Here we can configure the range of IPs of the LAN, in principle we would not have to touch it but it is possible that we want to change the subnet that we want to use. Normally all ISP modem-routers come with 192.168.1.1, therefore we can leave the default configuration, or change it to a different range.
A very important part of this menu is that we can set private IPs so that the computers always connect with the same IP address. This is useful if we have a computer acting as a server or if we want to download P2P programs such as Bittorrent without any problem. By assigning a fixed IP to a device, we can make sure that if we open a port for it, it does not change its address.
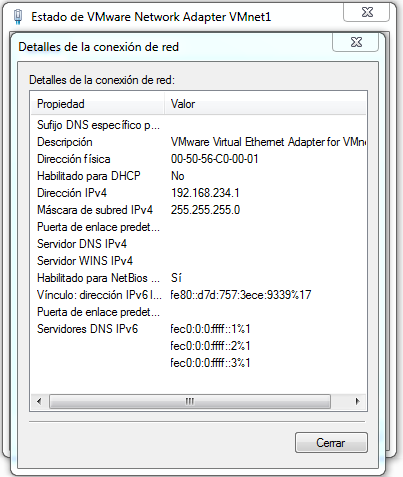
To configure the Static DHCP we must know the MAC address of our network card, for this we go to Start, Control Panel, Network Center and then click on « Change adapter configuration «, then we double click on our network card that we are using to connect to the router and click on « Details «, the physical address will appear as you can see here:
We have to enter this physical address in the router section when we click on ” Add Entries “, we have to put the MAC address with a colon and not with hyphens. In the following image you can see an example of how to enter it:
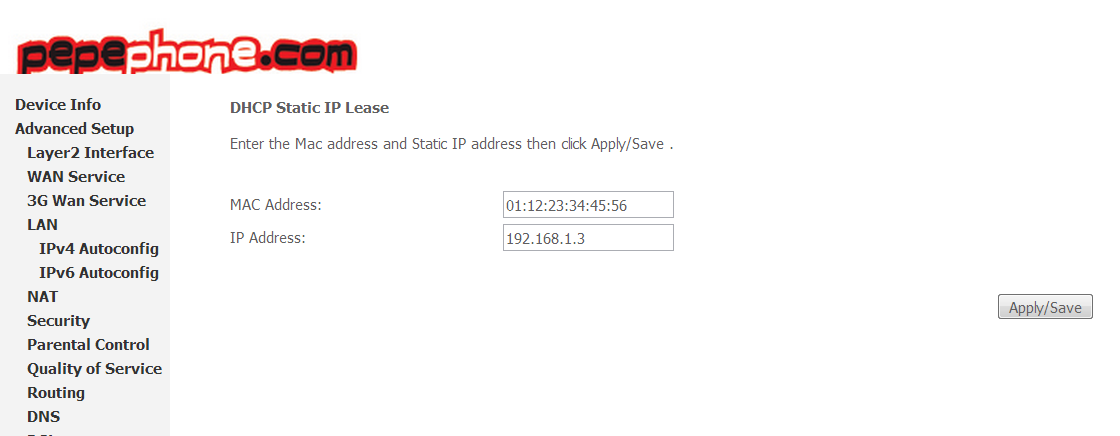
Along with the MAC, we must enter a private IP address, we can choose the one we want within the 192.168.1.X subnet but whenever we connect the equipment it will have the same one. Once we click on APPLY / SAVE, it will return us to the previous menu and we will have set the IP as you can see below:

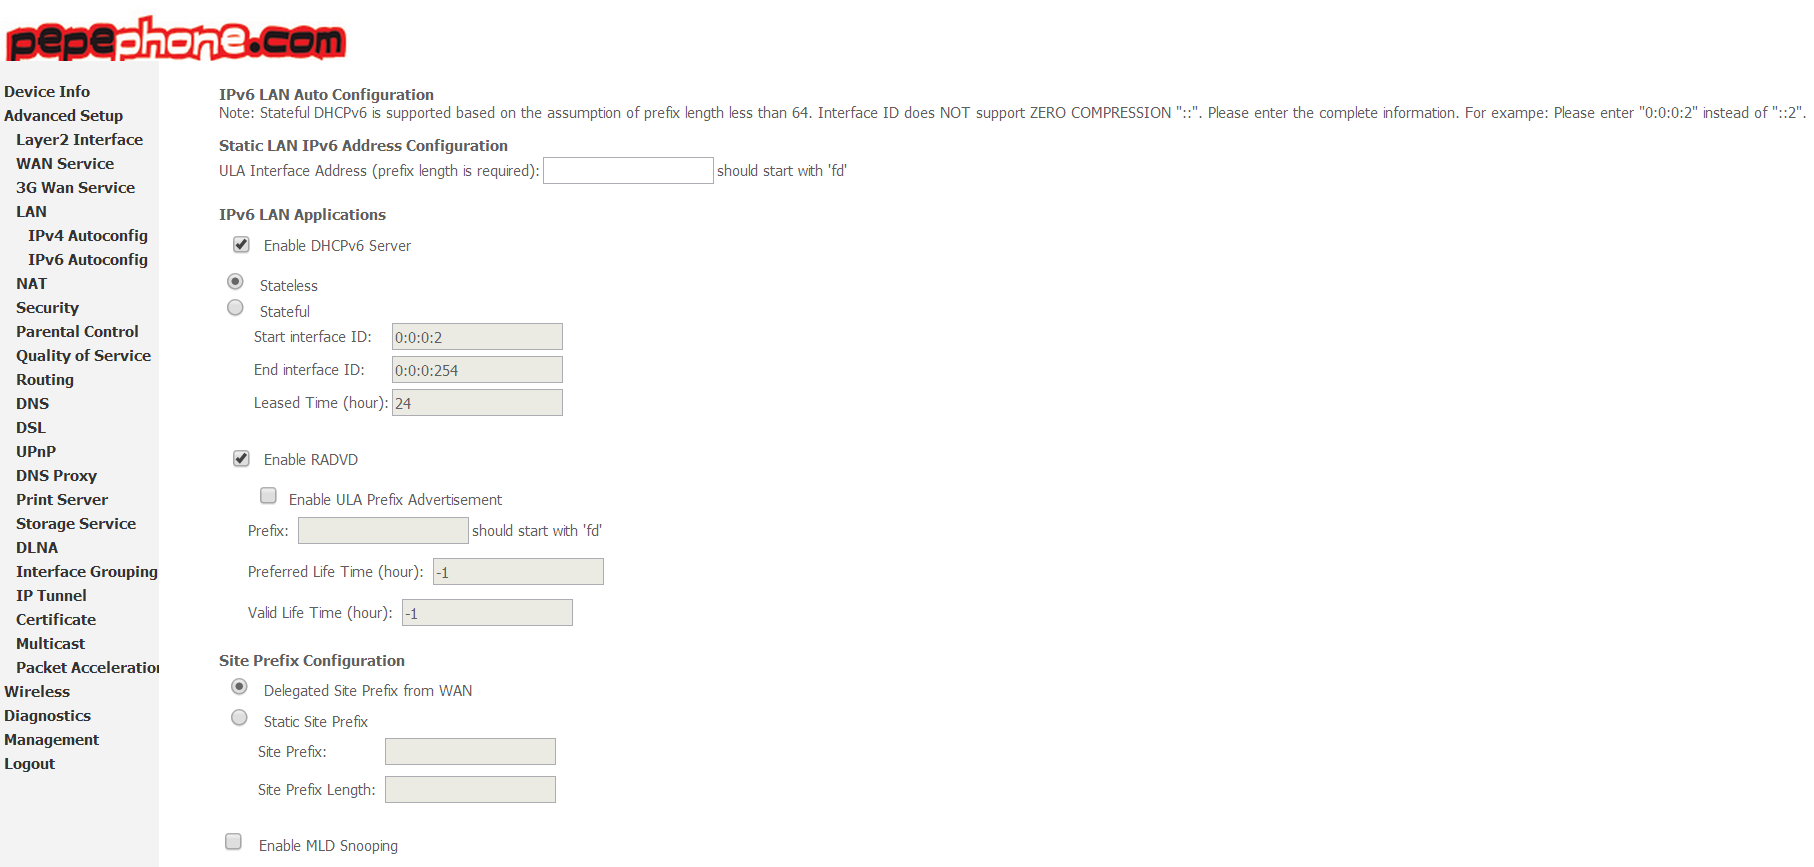
This router has IPv6 for the LAN enabled by default, in principle it is not necessary to touch any configuration since a priori we will always use IPv4:
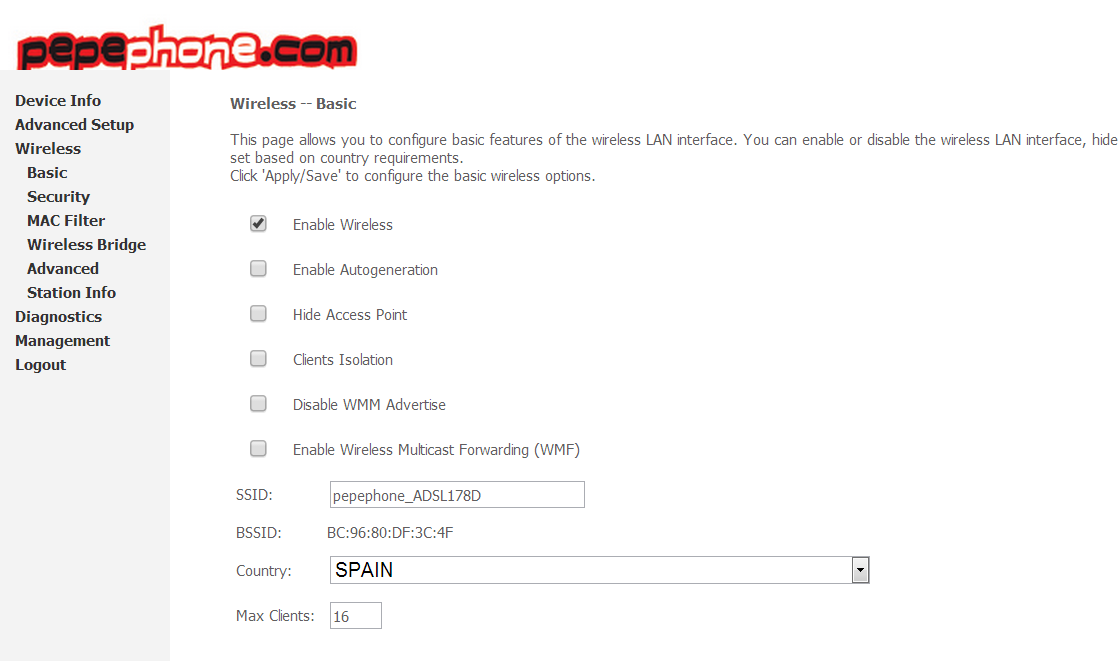
2.4GHz Wireless Configuration
The configuration of the Wi-Fi network is configured by default with a Pepephone ADSL SSID that we can customize at any time. It is not necessary to touch the name of the network if we do not want to. In the following screenshot you can see the main options for:
- Hide network name (ESSID)
- Isolating Wi-Fi clients so that they cannot communicate with each other is a security measure especially for guests.
In this menu, we can also configure several SSIDs for guests, we can configure it so that they cannot communicate with our private LAN and easily and quickly, it also allows us to configure another password different from the one we have for ourselves.
Pepephone has decided to provide a medium-high security configuration, they have chosen WPA-PSK / WPA2-PSK to reach the maximum number of people since if we use old equipment they may not be compatible with WPA2-PSK. They also have WPS enabled to make it easy for customers to connect quickly and easily.
In RedesZone we recommend you change the encryption type to WPA2-PSK only and choose AES as the encryption algorithm. We also recommend disabling the router’s WPS to avoid possible attacks. In the following image we show you how the configuration menu should look:

To choose the WPA key, we recommend that it be greater than 12 characters, alternating between uppercase, lowercase, number and symbols. If you don’t have any preference for a custom key, you can always use our random WPA2 key generator for maximum security. This program will allow you to set the length of the key and later generate it in a random and robust way mixing symbols, numbers, etc.
The advanced Wi-Fi configuration that Pepephone has made in this router is excellent, they have decided to put a channel width of 40MHz for the 2.4GHz band to ensure that we will reach speeds of up to 300Mbps. Other operators have the 20 / 40MHz automatic channel width, so in places with many wireless networks, we will never be able to synchronize at more than 150Mbps. Therefore, we will always achieve the maximum possible wireless performance, in the advanced configuration we recommend leaving it by default since all the values are correct.

How to open ports individually on the Pepephone NuCom NU-GAN5
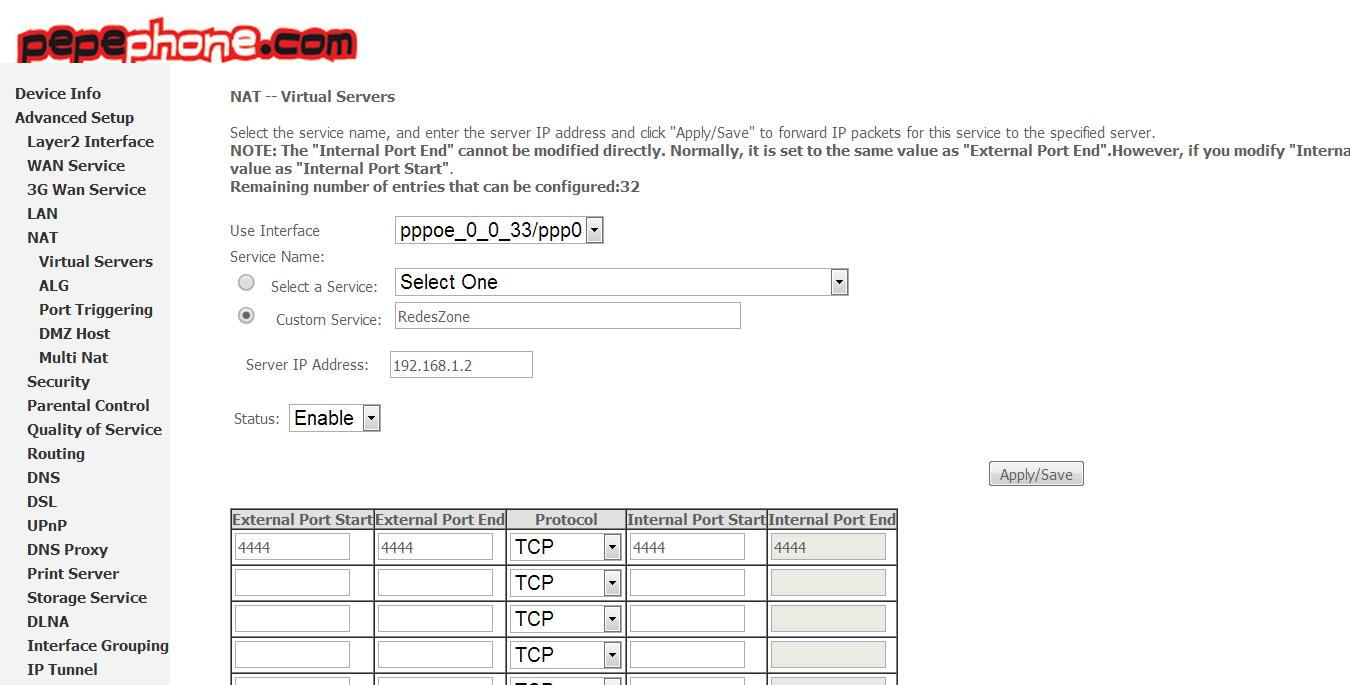
To open ports on this Pepephone router, we must go to Advanced Setup / NAT / Virtual Servers, then click on « Add » to add a new rule:
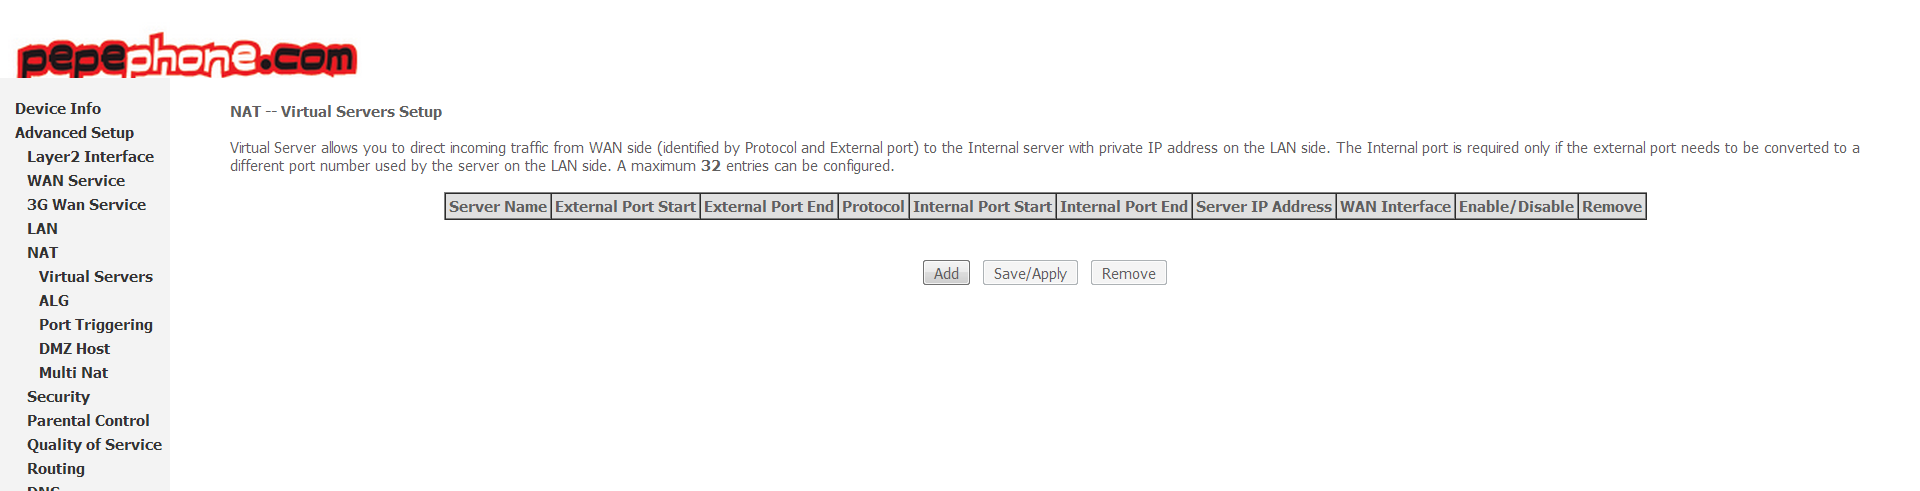
Now we click on ” Custom Service ” and put the name we want to open a custom port, we must also indicate the private IP address to where we want to open the port. Then we click on Status and choose “Enable”, then we choose whether to use TCP or UDP protocol and finally we put the port to open. If we are going to open only one port, it would be enough to repeat the same number in both boxes. Finally, if we want to open several ports, we can fill in the boxes in the second row, third row, etc.
When we are done, we must click on Apply / Save to save the changes.
When we have saved the changes, we will return to the previous screen and we will see the following:
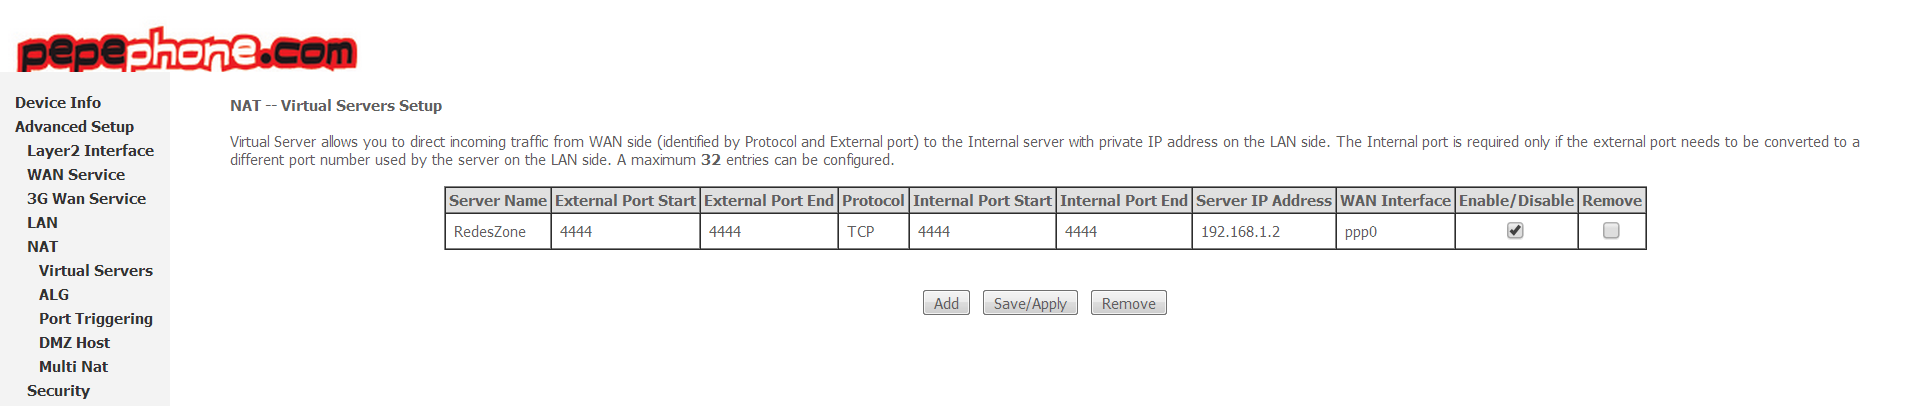
How to open a range of ports on the Pepephone NuCom NU-GAN5
If we want to open a range of ports, for example from 2000 to 2010, it would be enough to put 2000 in the first box and in the second 2010. The rest of the steps are exactly the same as to open an individual port.
DMZ configuration to avoid moderate NAT on CONSOLES
If we have consoles connected to our router either via Wi-Fi or cable, on many occasions we will get the message of «moderate NAT». To avoid all kinds of problems with the consoles, we can configure the DMZ (Demilitarized Zone) so that all ports are open to a specific private IP address, in this case for the console. To open the DMZ we must go to Advanced Setup / NAT / DMZ Host and put the private IP address of our console:
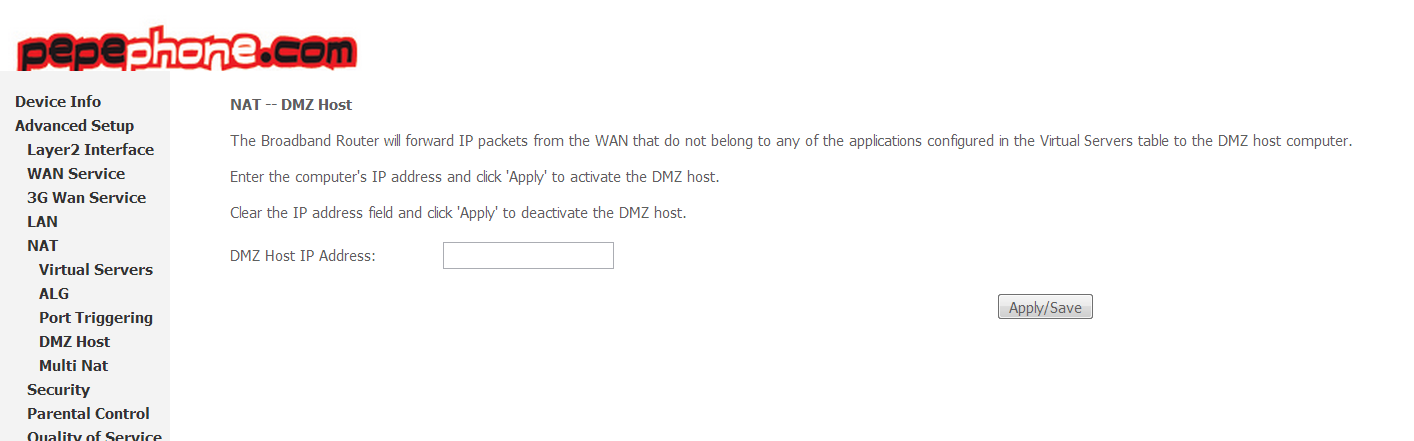
It is not recommended to open the DMZ to a computer or other device if you do not have a properly configured and enabled firewall, since your computer would be totally exposed to the Internet.
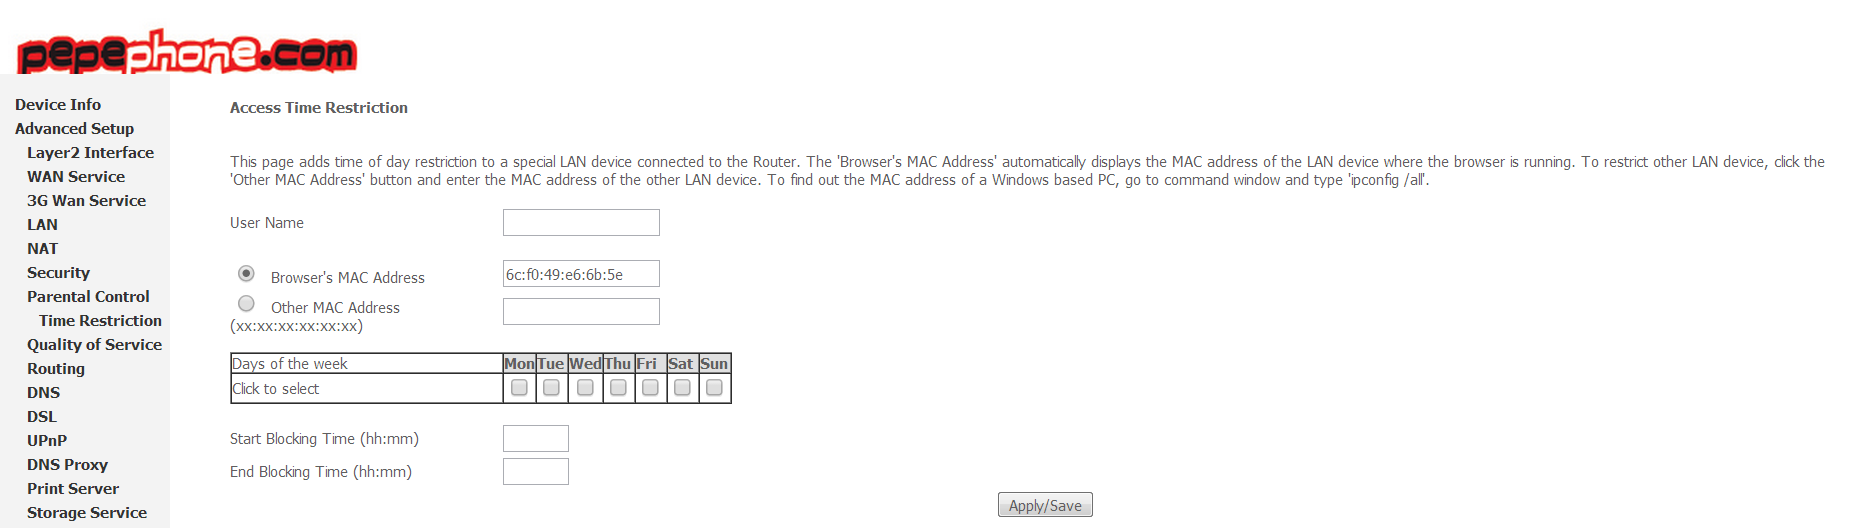
Parental Control: Time Restrictions
The parental control of this router is very simple and we have the most basic parental control options. To set a parental control configuration we go to Advanced Setup / Parental Control and click on ” Add ” to add a new rule.
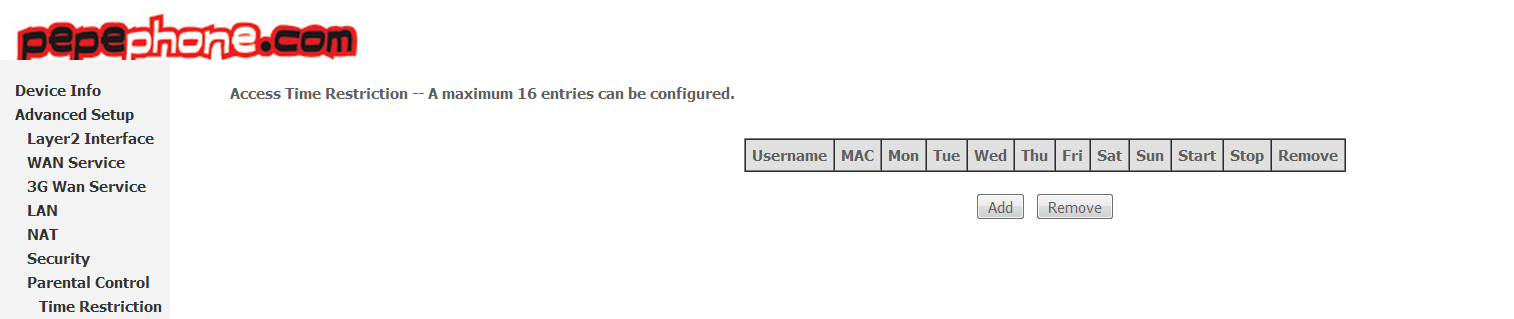
Now we set the different days of the week and a time to limit the Internet connection of a certain computer, we must always have its MAC address to limit access:
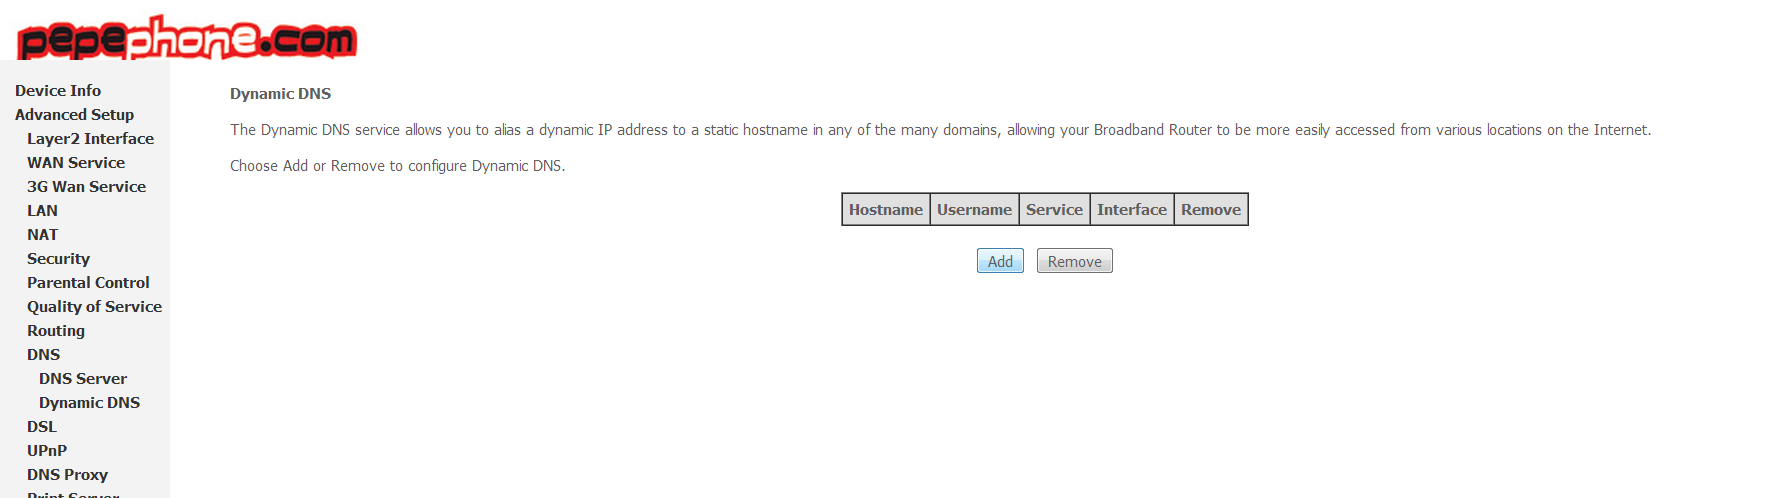
Dynamic DNS configuration: DynDNS and No-IP
This Pepephone router supports various services for dynamic DNS among which DynDNS and No-IP stand out. Dynamic DNS is used to have a domain address that always points to our public IP address. In this way, we can access our home servers without having to remember the public IP address since we remember it is dynamic, and therefore, with each restart of the router it will change. To configure the Dynamic DNS we must go to Advanced Setup / DNS / Dynamic DNS and click on “Add” to add a new rule.
Now we must select the service in which we are registered. DynDNS today is still paid, however No-IP is free and you can read this manual to sign up for the service. If we select No-IP we must enter the username (our email) and the access password together with the host that we have registered on the web.
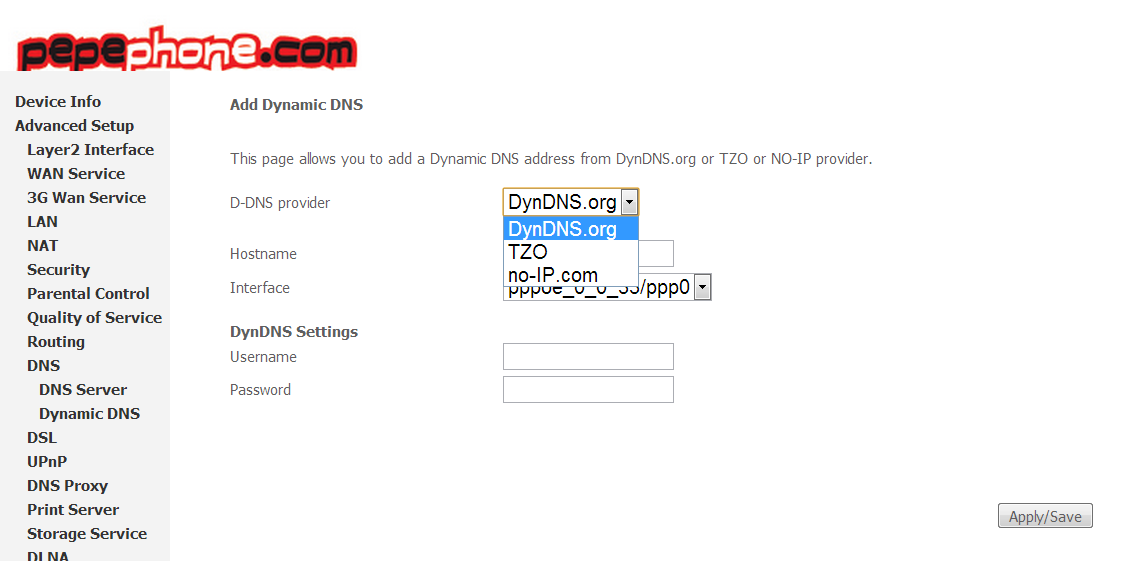
The interface in which it must operate is the WAN, that is, the ppp0 that comes by default, we must not touch this parameter.
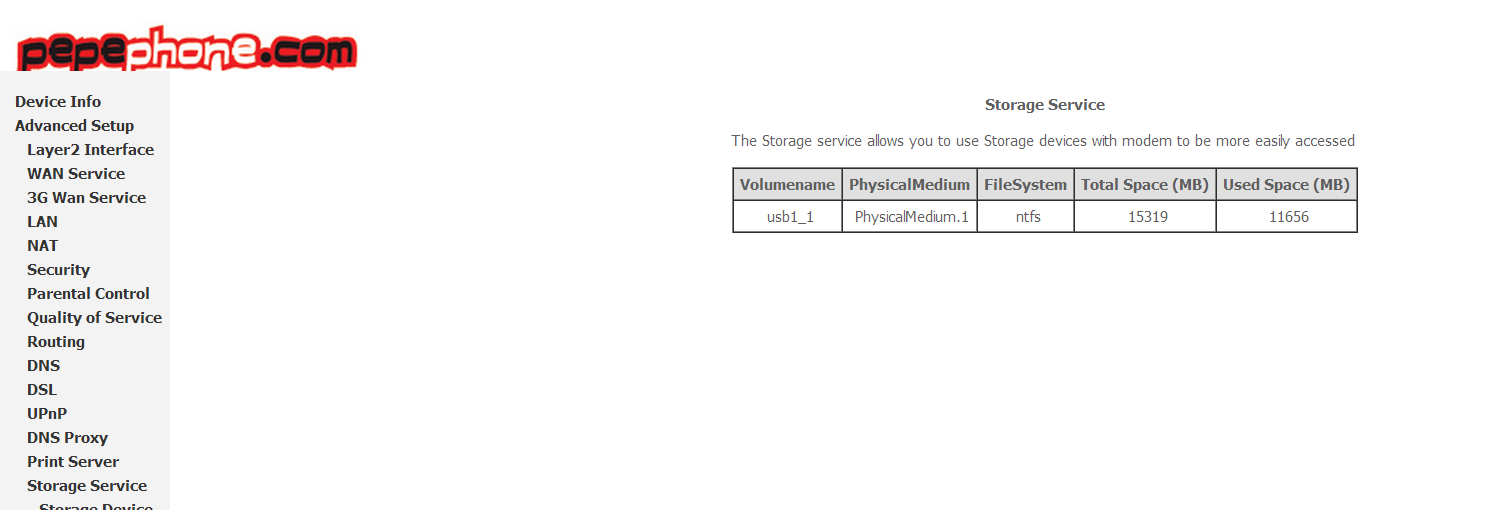
USB Configuration: How to configure the CIFS / SAMBA server
This router incorporates a USB 2.0 port that will allow us to share resources via CIFS / SAMBA in the local network. It also incorporates a media server (DLNA) to stream video to other devices such as our TV or mobile devices.
The first thing to do is insert the USB storage device, the following screen will appear:
Next we go to ” Server Config ” to configure the workgroup and activate file sharing via Samba. We click on Apply / Save to save the changes.
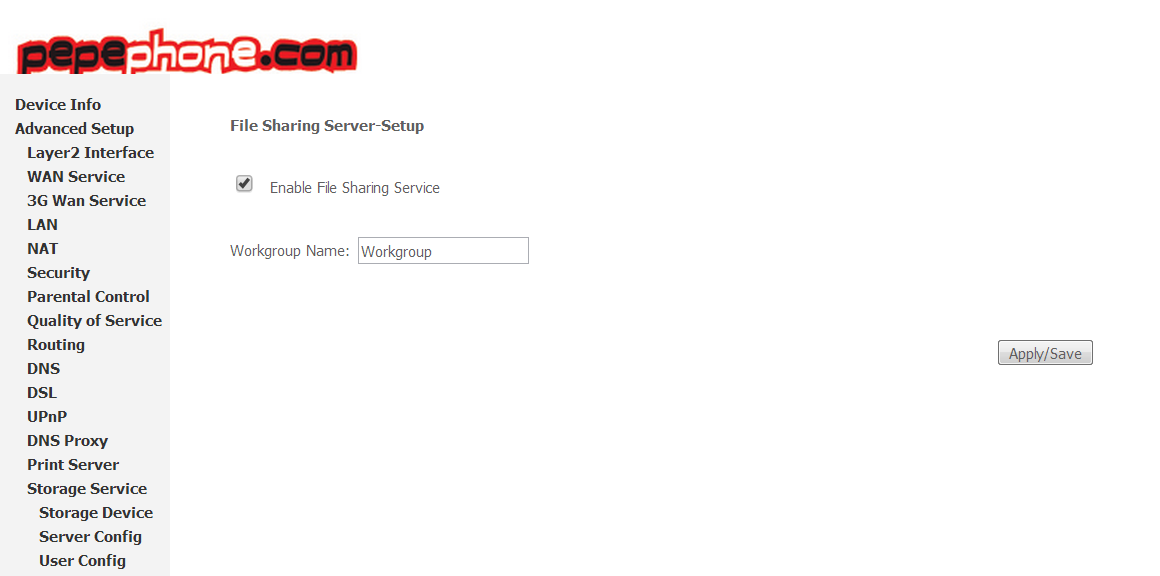
Next we must create users with permissions to access the device in question, we go to ” User Config ” to create new users or modify existing ones.
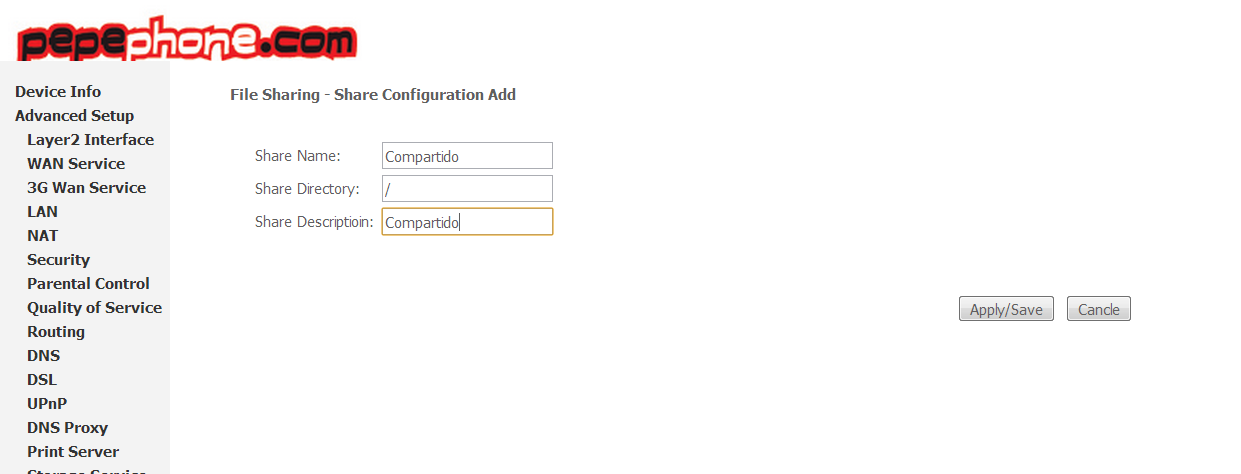
 And finally, we configure the path to share in the local network, if we want to share the entire unit it would be enough to put / or / mnt which is where the USB unit is mounted by default.
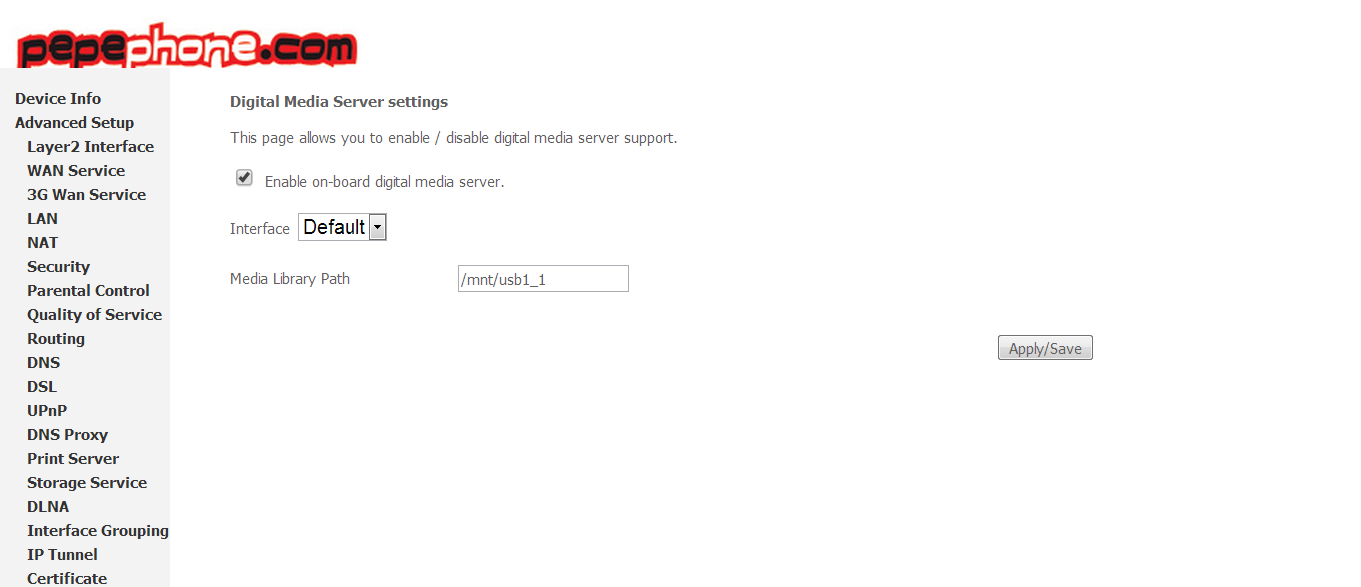
USB Configuration: How to Configure DLNA Media Server
To configure the DLNA media server, just go to the Advanced Setup / DLNA menu and activate the server, put the path to store the library (we can choose any path) and click on «Apply / Save» to save changes and for the server to start. to work:
Router management
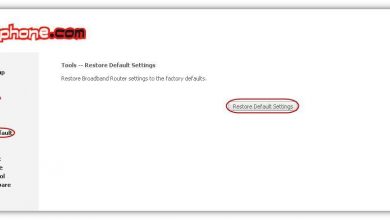
If we want to save or restore the personalized configuration that we have made to the router we must go to « Management / Settings «, in this part we also find the one to restore the default configuration of Pepephone.
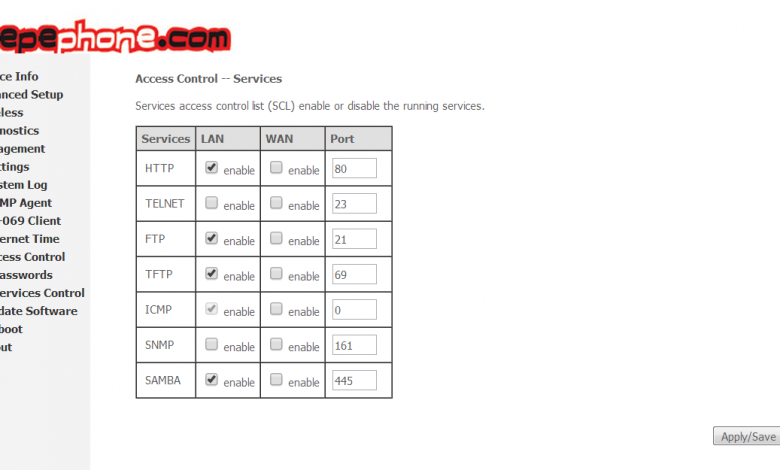
It is advisable to change the default password for access to the router, for this we must go to ” Management / Access Control / Passwords “, we indicate a new password for the user “admin” and apply changes.
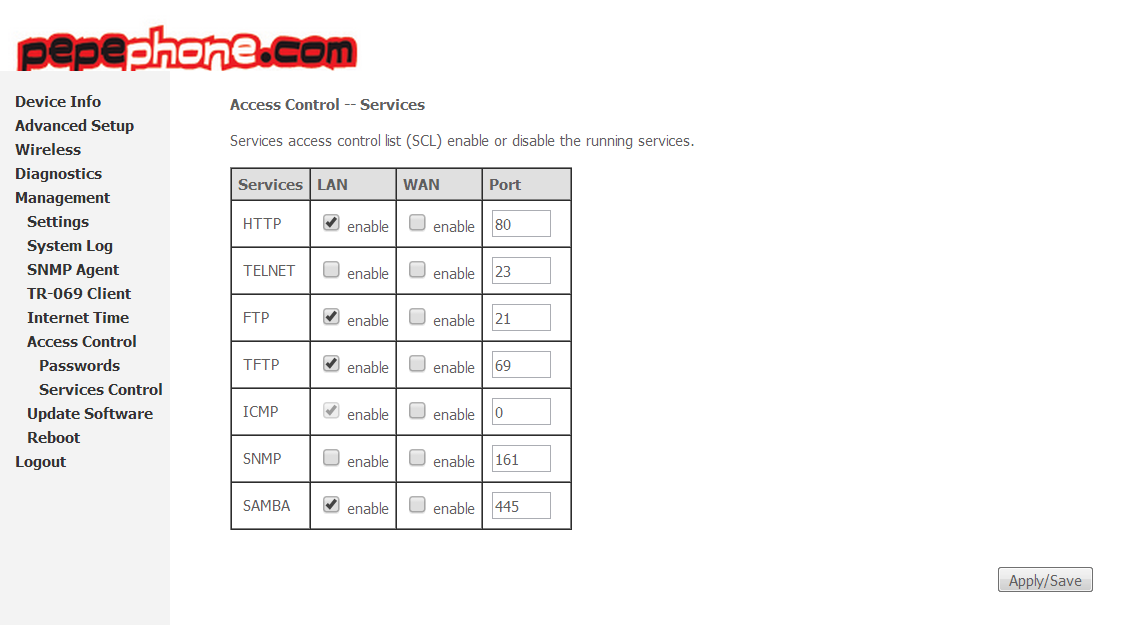
Finally, it is possible that we do not use several services of the router, in this case, it is best to deactivate the services that we are not going to use, the panel to manage this is in ” Management / Access Control / Services Control “. In the following image you can see the default configuration:
So far we have arrived with the configuration of the NuCom NU-GAN5 router from Pepephone ADSL. If you have any questions, you can put us a comment.