How to delete a Facebook group created by me, definitely
The procedure to permanently delete a Facebook group created by you is very simple. You will need to kick out all members and administrators one by one, including yourself. For this to be possible, certain conditions must be met. The main option is for the creator to delete it.
Another way to achieve this is that the main administrator, that is, the person who created it, decides to leave it previously and thus the other administrators will have the necessary permissions to delete the group, expelling the rest of the members. Otherwise, that user will not be able to be expelled, who will be able to manage this space as they wish.
So these are the requirements that must be met. The process to delete a group on Facebook that you have created yourself is not very science and will not take time. In addition, the steps that must be completed on the computer are very similar to those that you will see in the applications for mobile devices.
From the computer
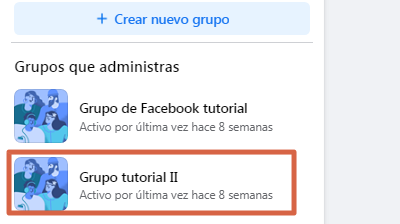
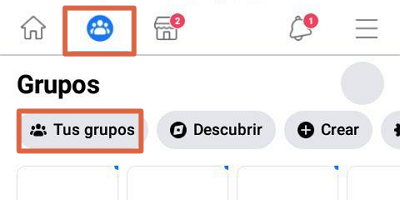
The desktop version of the social network has left its classic image behind, so in this guide you will see the steps to delete a Facebook group in the new version. For this you will have to log in to your account and access the groups section of the platform, for which you can use this link:https://www.facebook.com/groups/feed/. Then follow the other steps:
- Select the group you want to delete to enter.
- You should look for the ” Members ” section and press it to open.
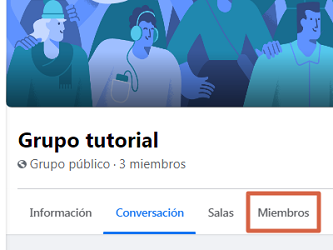
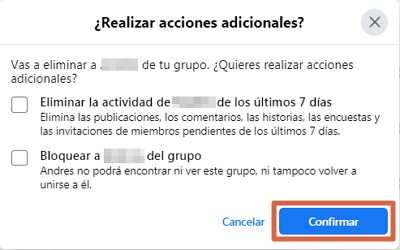
- You will find a list of all the people who are part of the group. Click on the three dots next to each member’s name and click on “ Remove member ”.
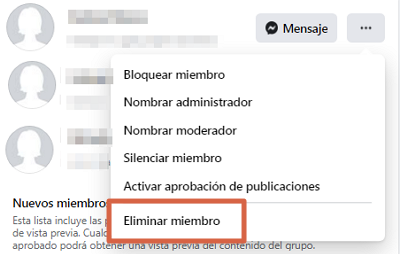
- Then you must confirm this operation, clicking on ” Confirm “.
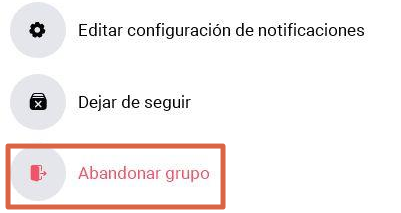
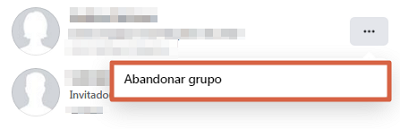
- Once you have removed the other members, you will be the last user in the group. Open the options and press ” Leave group “.
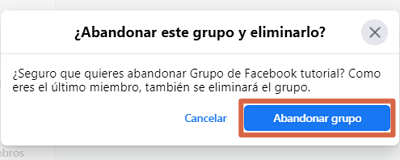
- Confirm the operation by pressing ” Leave group ” again.
From the phone
This platform also has the option of permanently deleting a Facebook group from the mobile. In the next section you will find the procedure to follow for both options, whether you use the Facebook application or its lighter alternative, Facebook Lite. They are both very similar, follow in their footsteps below.
Facebook App
To permanently delete a Facebook group created by you, using the mobile application, you must enter and log in to your Facebook account. After that, follow the steps shown below:
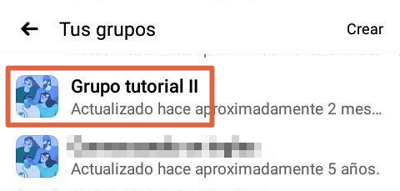
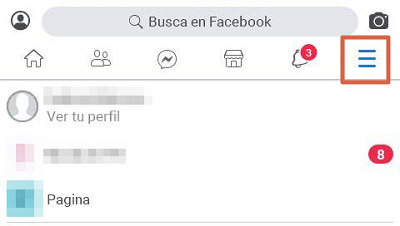
- Click on the groups icon and then on the option “ Your groups ”.
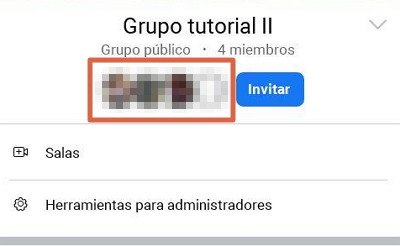
- Select the group you want to delete.
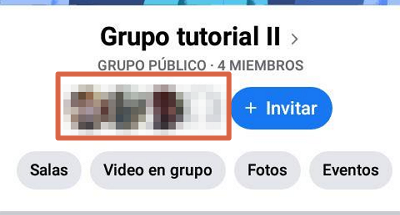
- You will see the information of the group, such as the type, name and number of people that make it up. Click on the photos of the members to enter their list.
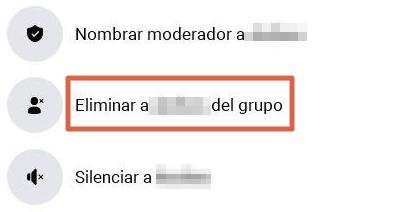
- Click on the three dots next to each user’s name to open the options.
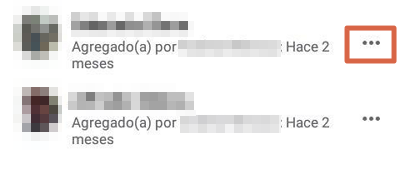
- Select ” Remove member.”
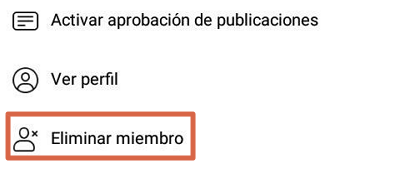
- You must confirm the operation by pressing ” DELETE MEMBER “.
- On the main page of the group, click on the icon on the left to access the Administrator Tools.

- Press ” Leave group “.
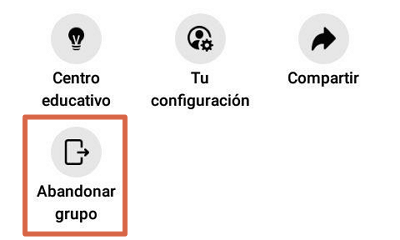
- You will see a warning that this way the group is deleted. Confirm the procedure by pressing ” QUIT AND DELETE “.
Once you have confirmed that you want to leave the group as the last member, you will have permanently deleted the group created by you using the Facebook application.
Facebook Lite
The process to delete a group from Facebook Lite can be a bit longer and visually vary, but it consists of the same steps. Enter the application and follow this guide to permanently delete a Facebook group :
- Open the drop-down menu by pressing the icon with three lines positioned vertically, in one corner of the screen.
- Look for the ” Groups ” option .

- You will see all the groups that you have joined. It may be necessary to press ” See more ” first and then ” See all ” to find the ones you manage.
- Once you have located it, select the group that you have created and want to permanently delete it.

- You will be able to see the information of the group, including the members and a thumbnail of their photos. Click on the preview of the members to open the list.
- Once in this list, you just have to press the name of each of the members to open the options.

- Press ” Remove (member’s name) from group.”
- Later you must press ” Confirm ” to complete the operation.
- On the main page, near the group information, click on the down arrow to open more options.

- Click on ” Leave group “.

- Press ” Yes ” to confirm.
By kicking out all members and confirming that you want to leave the group, you have completed the process.
The main difference of the procedure in Facebook Lite, compared to the main application, is that, in the group part, there are all those in which you have joined, without differentiating those that are managed by you, so it may take longer. access the one you want to delete. However, you will have no problem closing a Facebook group permanently, if it was created by you, in any of its versions.